Trip Planning
Trip Planning Overview
Trip planning involves creating a plan for distributing items to multiple customers. The system uses AI to create the best trip plan based on location, vehicle availability, and time constraints. This AI-powered module can generate trip plans based on various configuration options for optimal delivery efficiency.
There are five submodules in trip planning:
- Planning Template:-Plan trips effortlessly by configuring parameters and constraints using planning templates. These templates, tailored to your specific needs, offer multiple configurations and act as a flexible framework for efficient trip planning across various scenarios, optimizing your operational setup.
- Trip Plan:-Use the AI-powered trip planner to create efficient delivery routes. Name the plan, select the project and order segment, pick the planning date, and choose a template. The system generates the best plan for order deliveries.
- Driver Zone:-Create zones and assign them to drivers to optimize your delivery workflow. Efficiently manage operational areas, ensuring streamlined and optimized driver assignments.
- Region Restriction:-These restrictions help control trip planning, ensuring that orders are not planned in restricted regions for a more tailored and efficient delivery operation.
- Tags:-Use tags for efficient trip planning, linking trips to customer groups, locations, and vehicles. Apply tags to streamline planning, consolidating orders for specific groups in designated regions for tailored delivery.
Planning Template overview
Plan trips effortlessly by configuring parameters and constraints using planning templates. These templates, tailored to your specific needs, offer multiple configurations and act as a flexible framework for efficient trip planning across various scenarios.
How to Set Up and Add Planning template
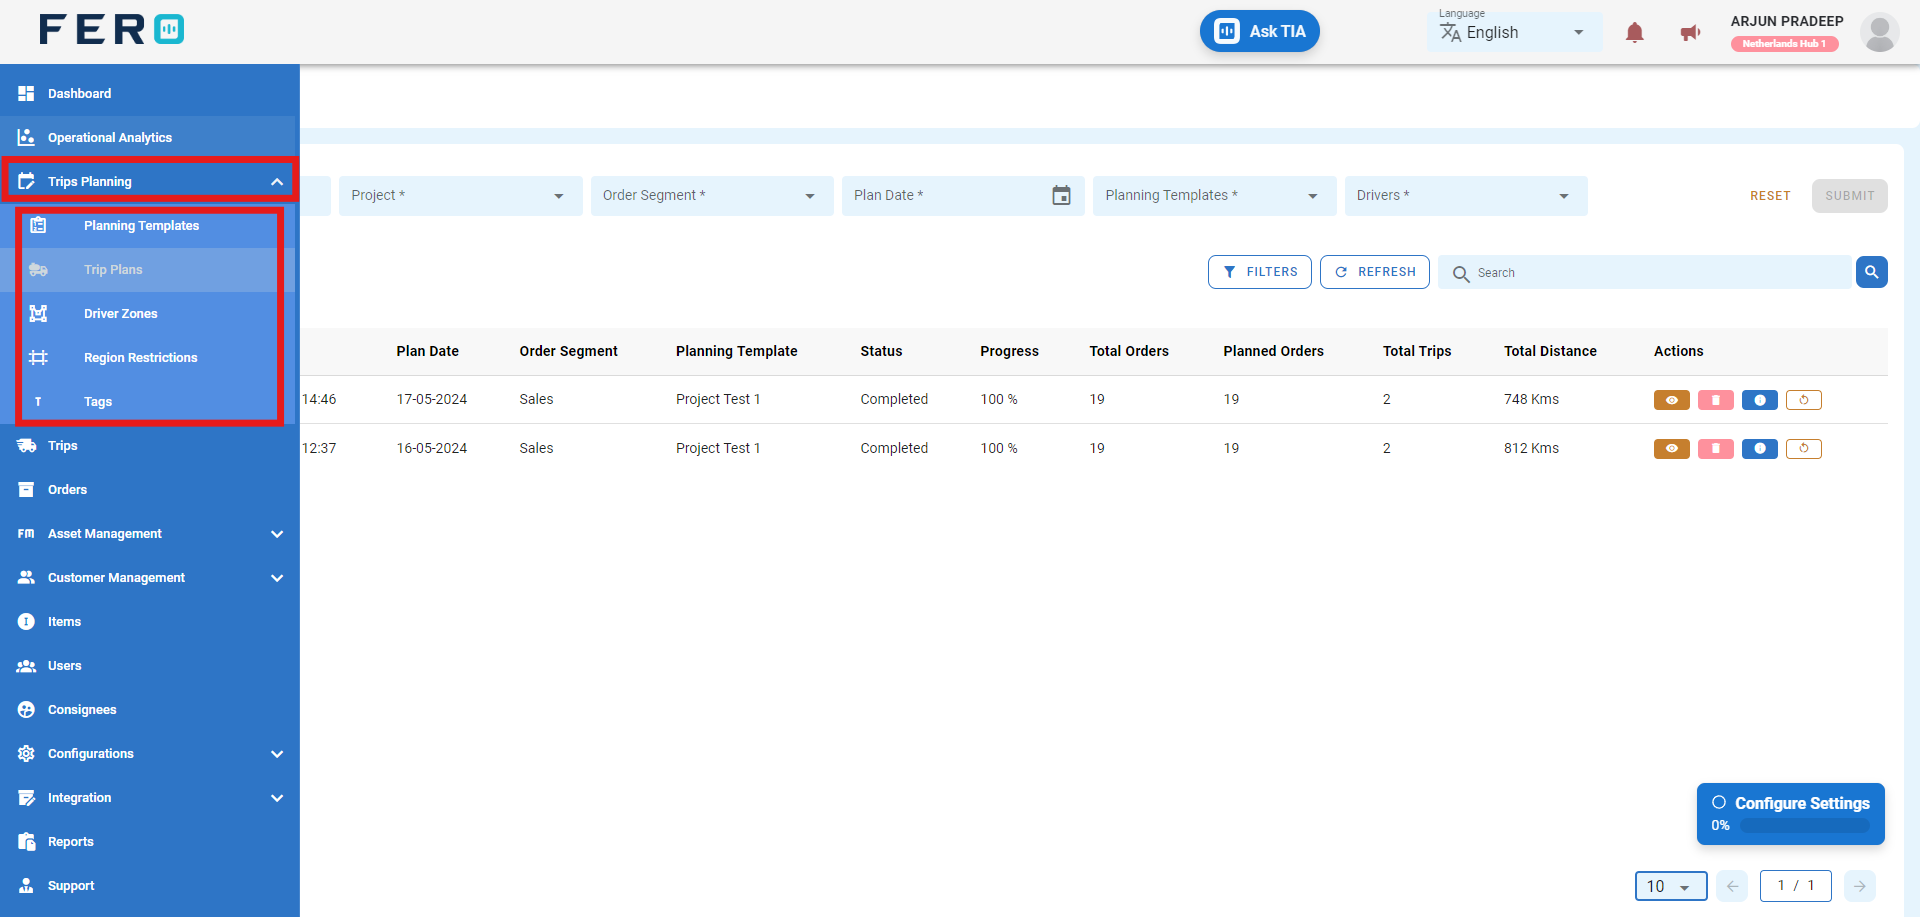
Step 1 :- Access the Trip Planning module from the menu bar and select it to reveal a drop-down list of submodules.
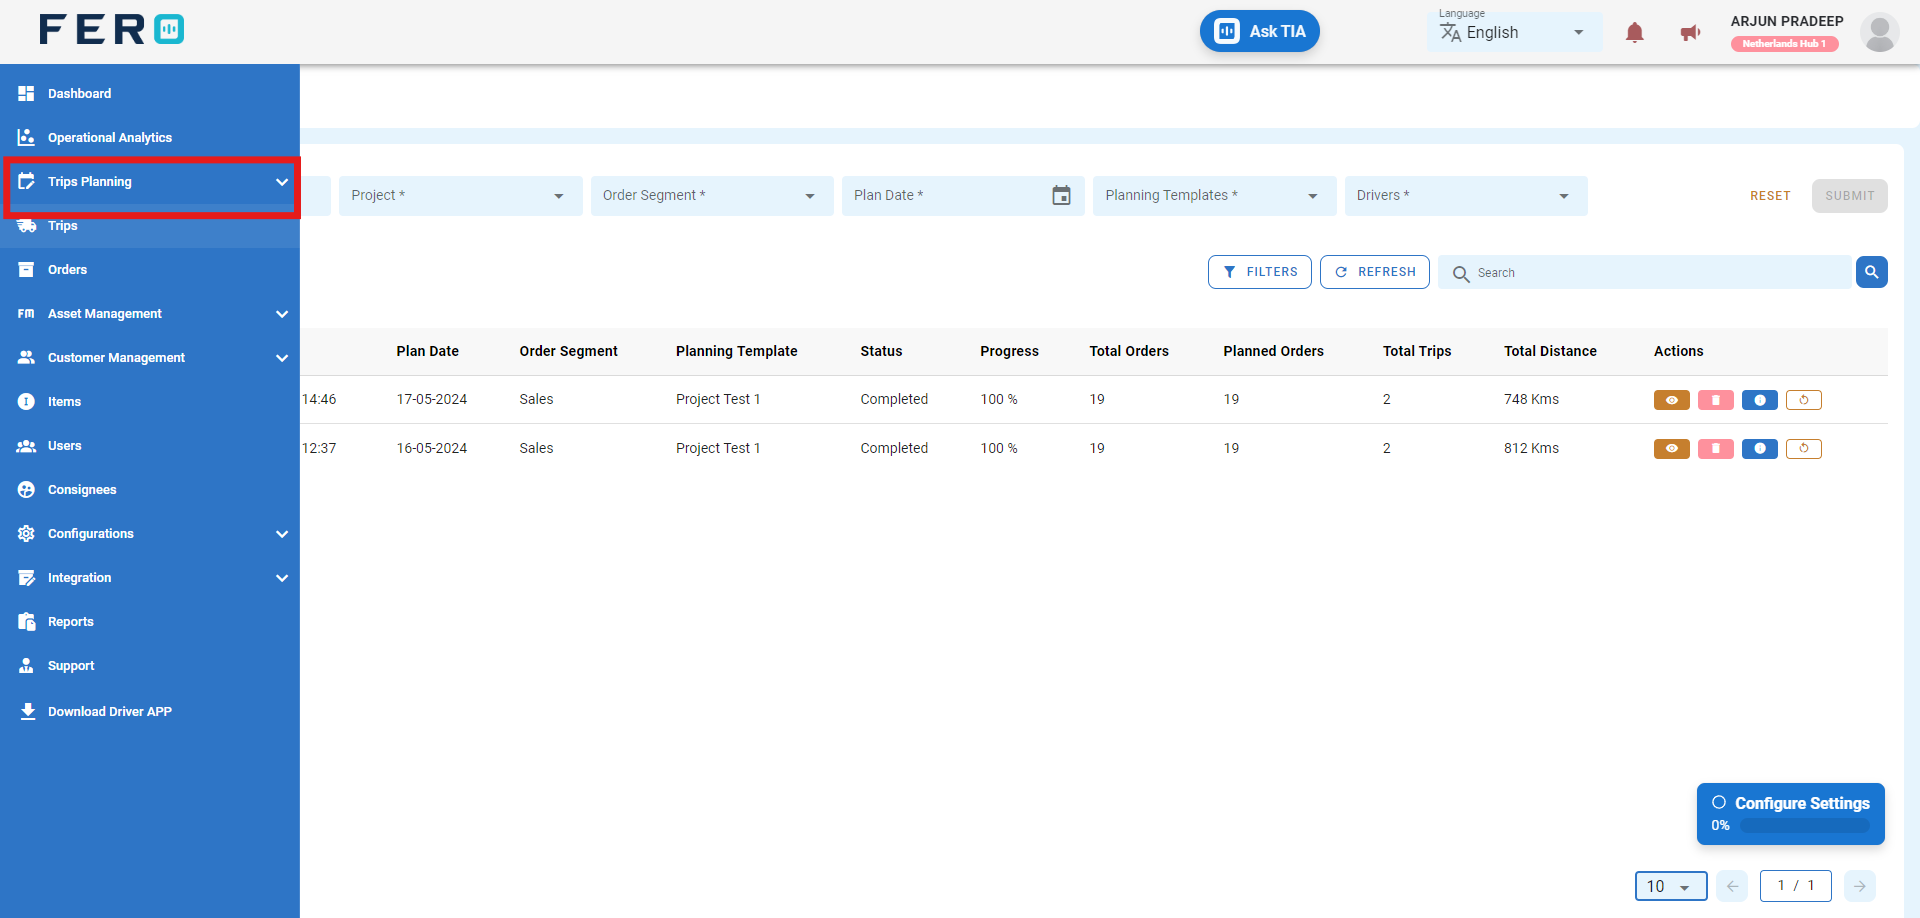
Step 2 :- Go to the Planning Template section and click to open the planning template homepage.
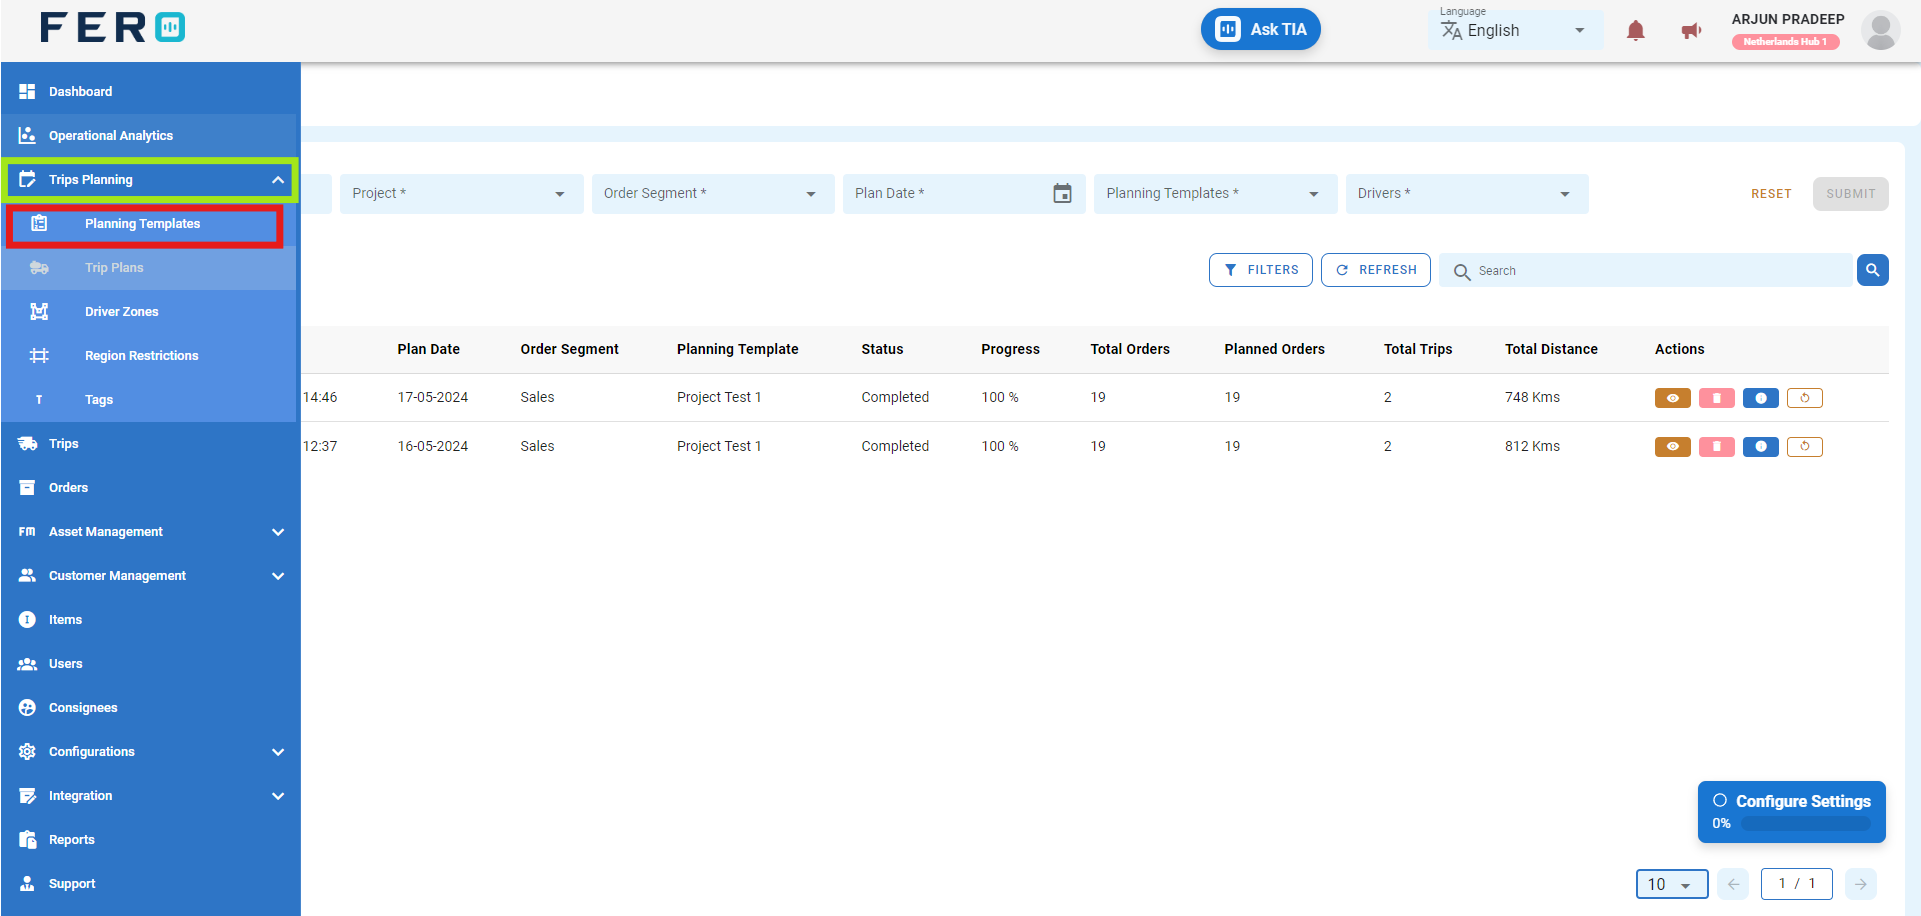
Step 3 :- Click on "Add Planning Template" to start adding Planning template to the platform.
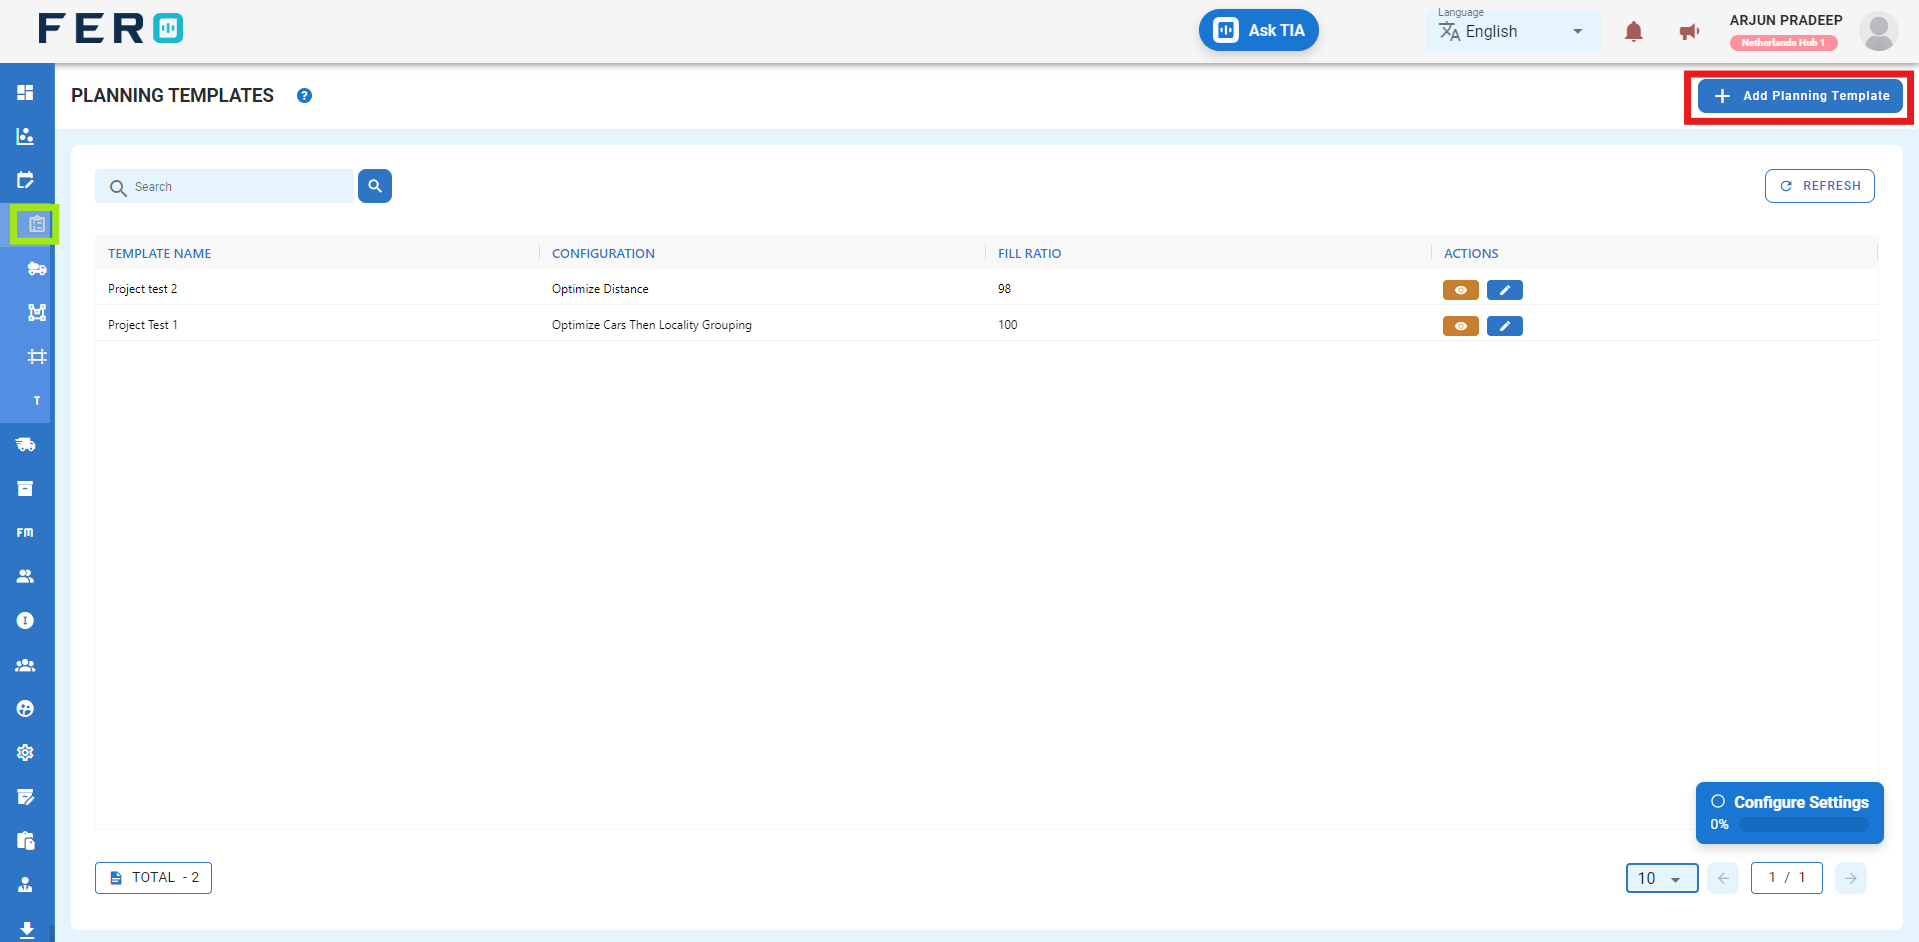
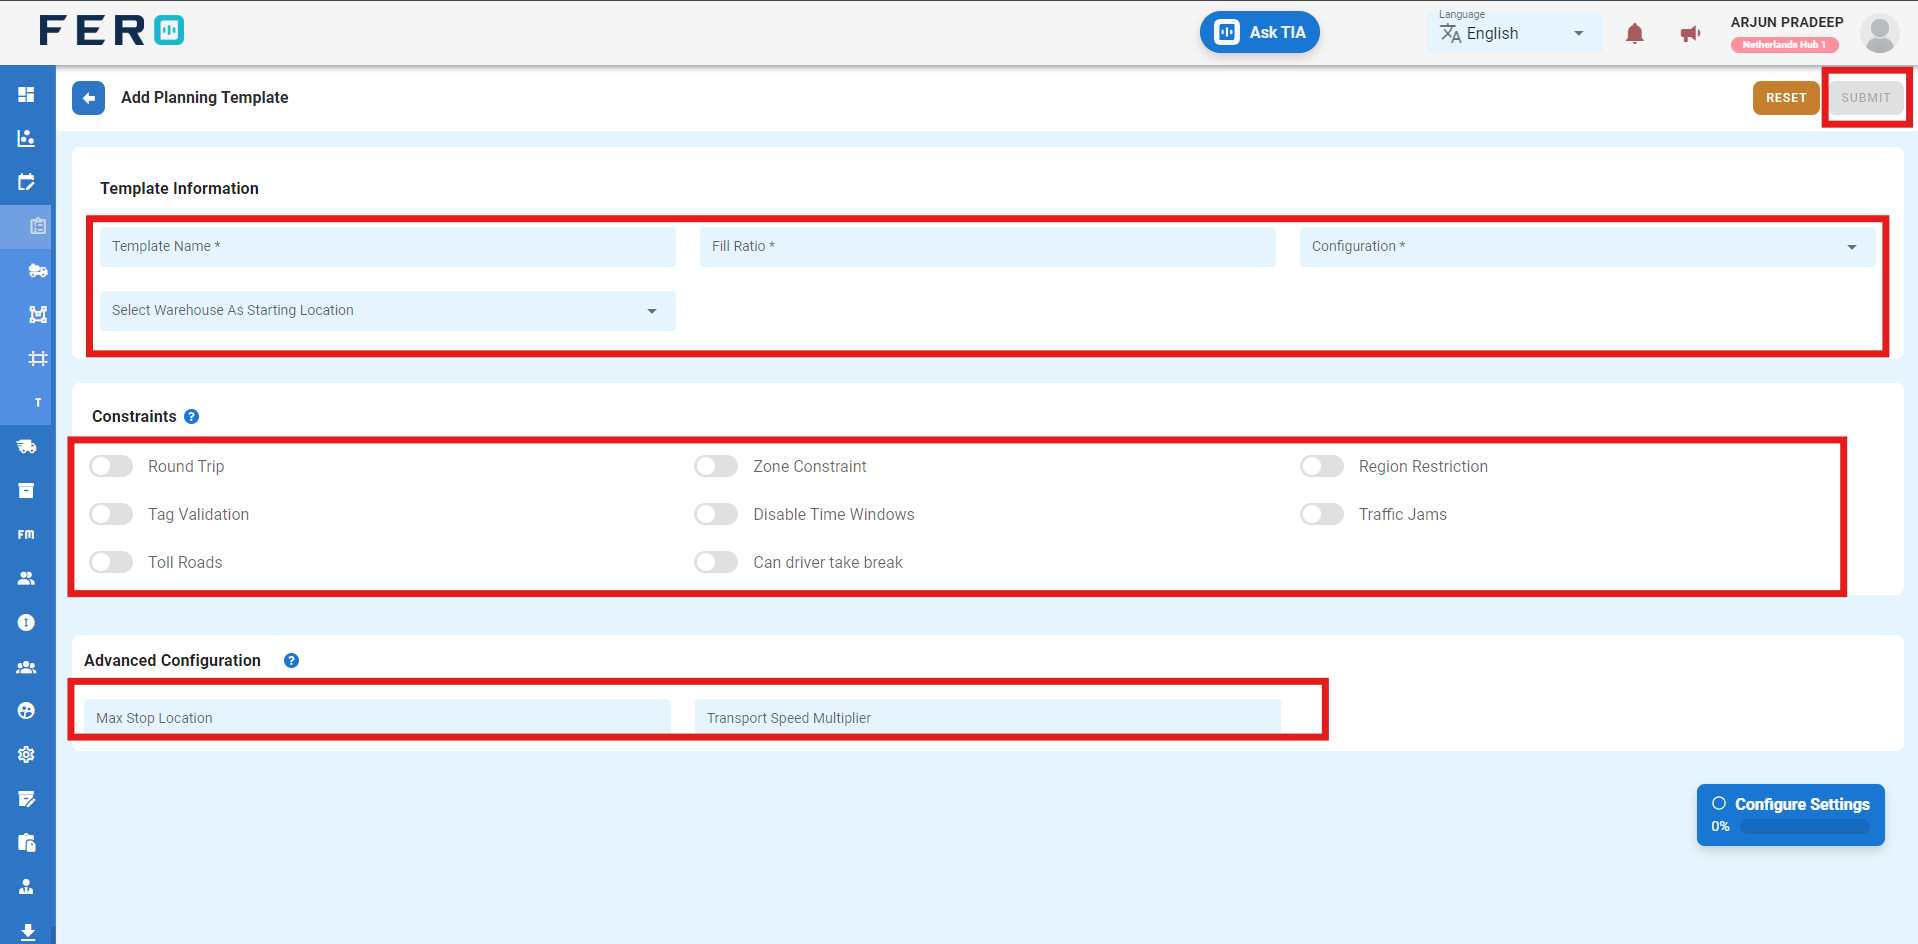
Step 4: Fill Out the 'Add Planning Template' Screen
- Template Name: Enter the name of the template.
- Fill Roti: Specify the value for Fill Roti.
- Configuration Scenarios: Select scenarios from the drop-down list.
Next, set up the constraints of the planning template by toggling the relevant buttons based on your requirements:

- Round Trip: Activate this option for round trips.
- Tag Validation: Enable or disable tag validation to consider customer location tags and vehicle tags in the template.
- Toll Roads: Enable or disable the consideration of toll roads during trip planning. Note that enabling this may increase travel time.
- Zone Constraints: Enable or disable zone constraints, which refer to the "driver zone" created in the system.
- Disable Time Window: Enable or disable consideration of customer delivery windows while planning the trip.
- Can Driver Take Breaks: Enable or disable consideration of driver break timings. If enabled, the total trip plan time may increase.
- Region Restrictions: Enable or disable region restrictions. If enabled, customer locations within restricted regions will not be included in the planning.
- Traffic Jams: Enable or disable consideration of traffic jams during trip planning. If enabled, travel time may vary based on traffic conditions.
- Max Stop Locations: Choose the maximum number of customer drop-offs per trip. This helps optimize routes by limiting stops.
- Transport Speed Multiplier: Adjust the vehicle's average speed multiplier to enhance Estimated Time of Arrival accuracy. Tune it from 0.1 for slower speeds to 3 for faster journeys.
After filling out these fields, click the "Submit" button. Your Planning Template will be created in the system, allowing you to manage it effectively within your transportation operations.
FAQs
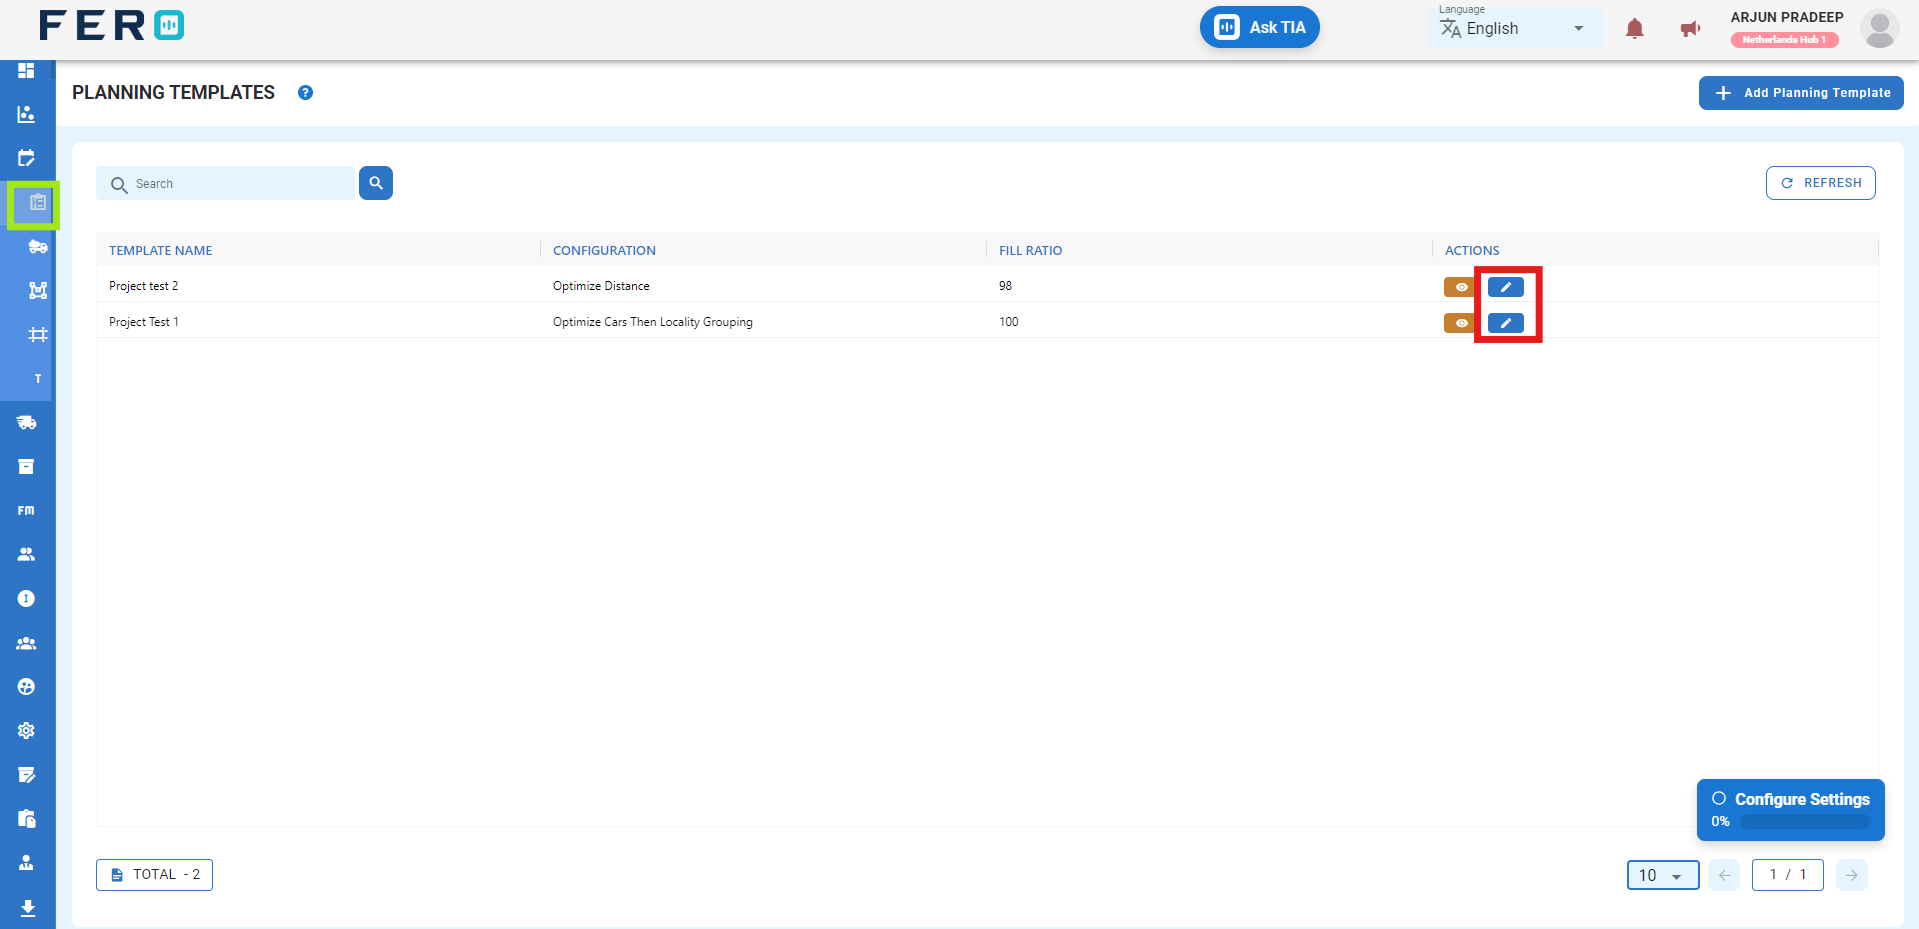
Q1.How to Edit the Planning Template?
Yes, you can edit the planning template. Navigate to the edit icon in the planning template home screen.
Trip Plans overview
Plan My Trip Use AI-powered trip planner to create efficient delivery routes. Just name the plan, select project and order segment, pick planning date, and choose template. System generates best plan for order deliveries.
How to Set Up and Add Planning template
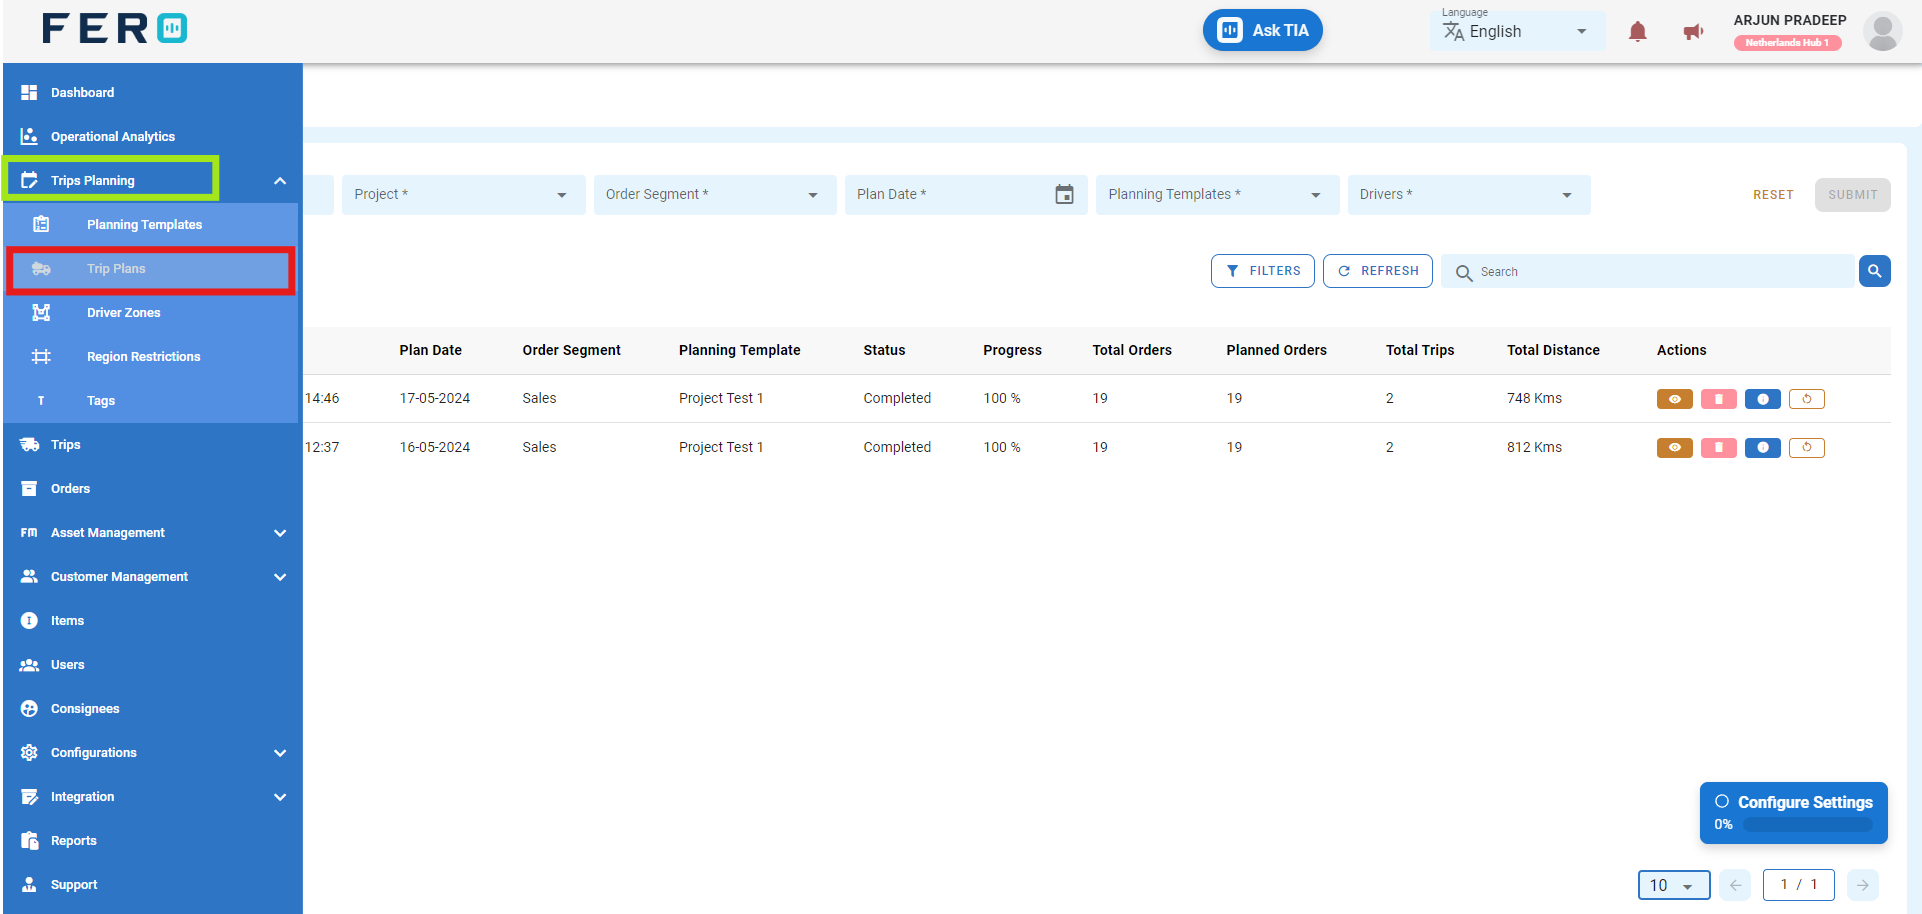
Step 1 :- Access the Trip Planning module from the menu bar and select it to reveal a drop-down list of submodules.

Step 2 :- Go to the Trip plans section and click to open the Trip plan homepage.
Step 3: Fill Out the 'Trip Plans' Screen
- Plan Name: Enter the name of the plan.
- Select project from the drop down list.
- select Order segment from the drop down.
- Select Plain date of the orders date.
- Select Planning template from the drop down list.
- Select Drivers from the drop down list.
after filling this details list of all the orders will appear
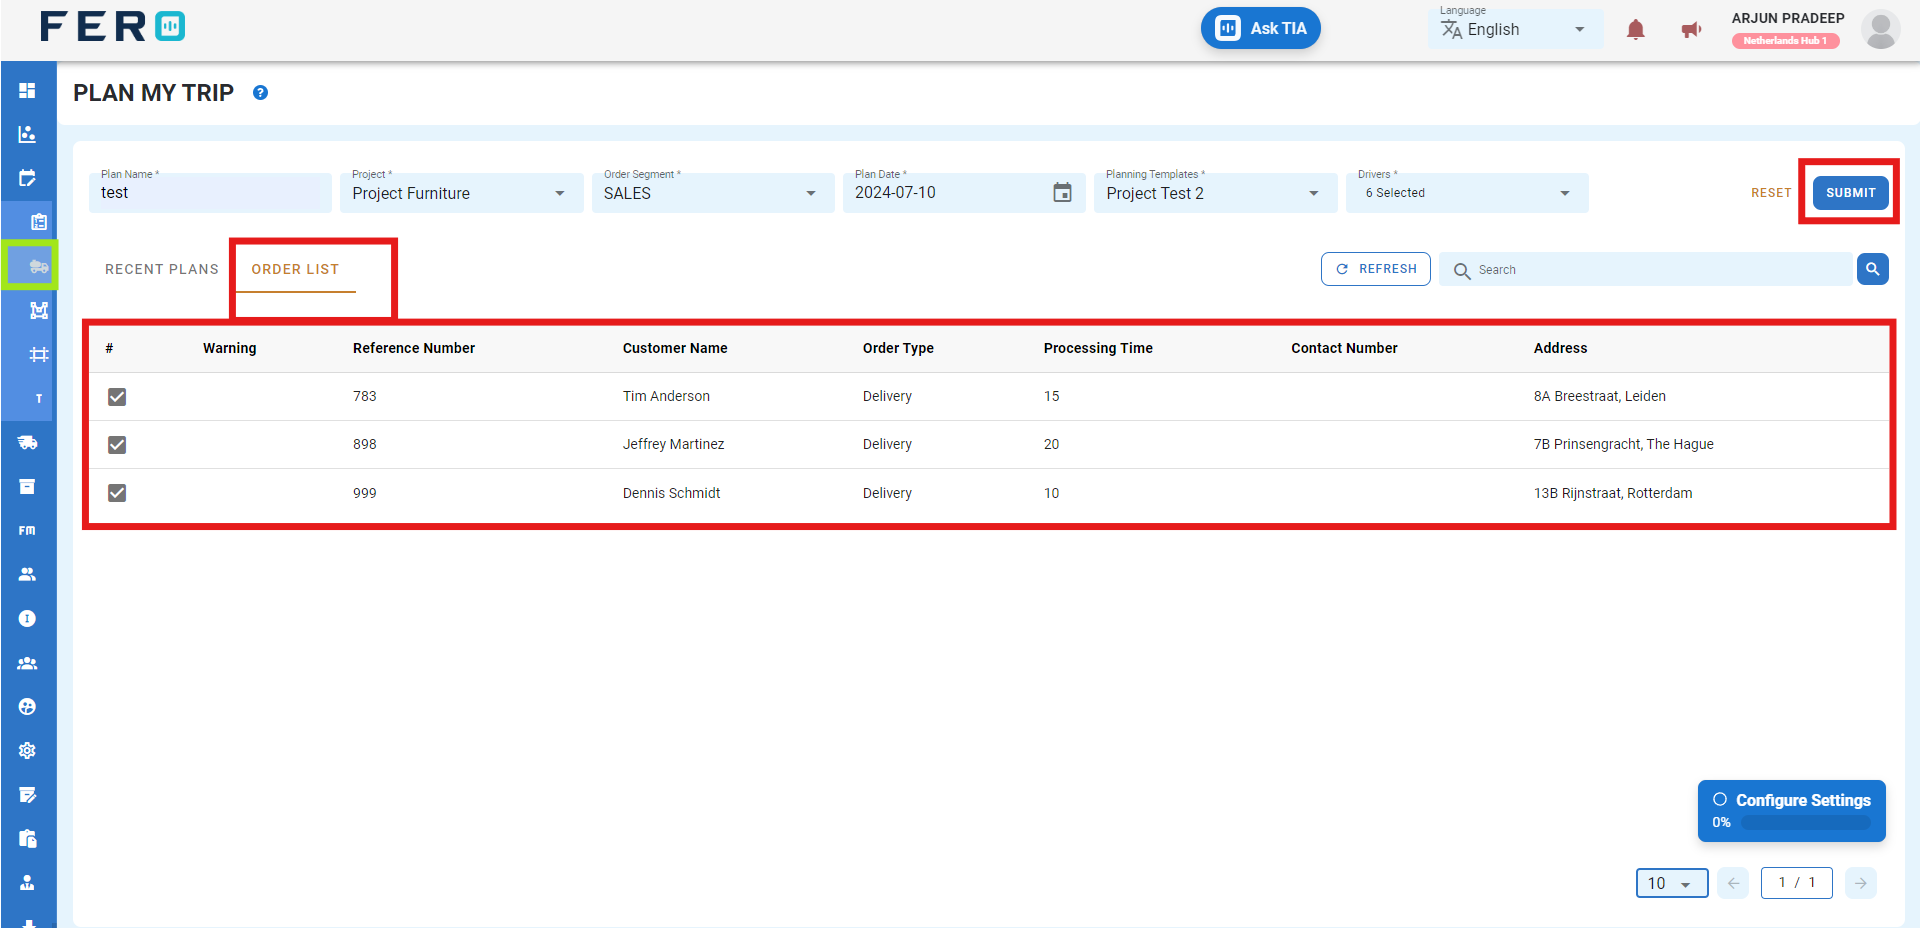
After filling out these fields, click the "Submit" button. system will create a trip plain in the system, allowing you to manage it effectively within your transportation operations.
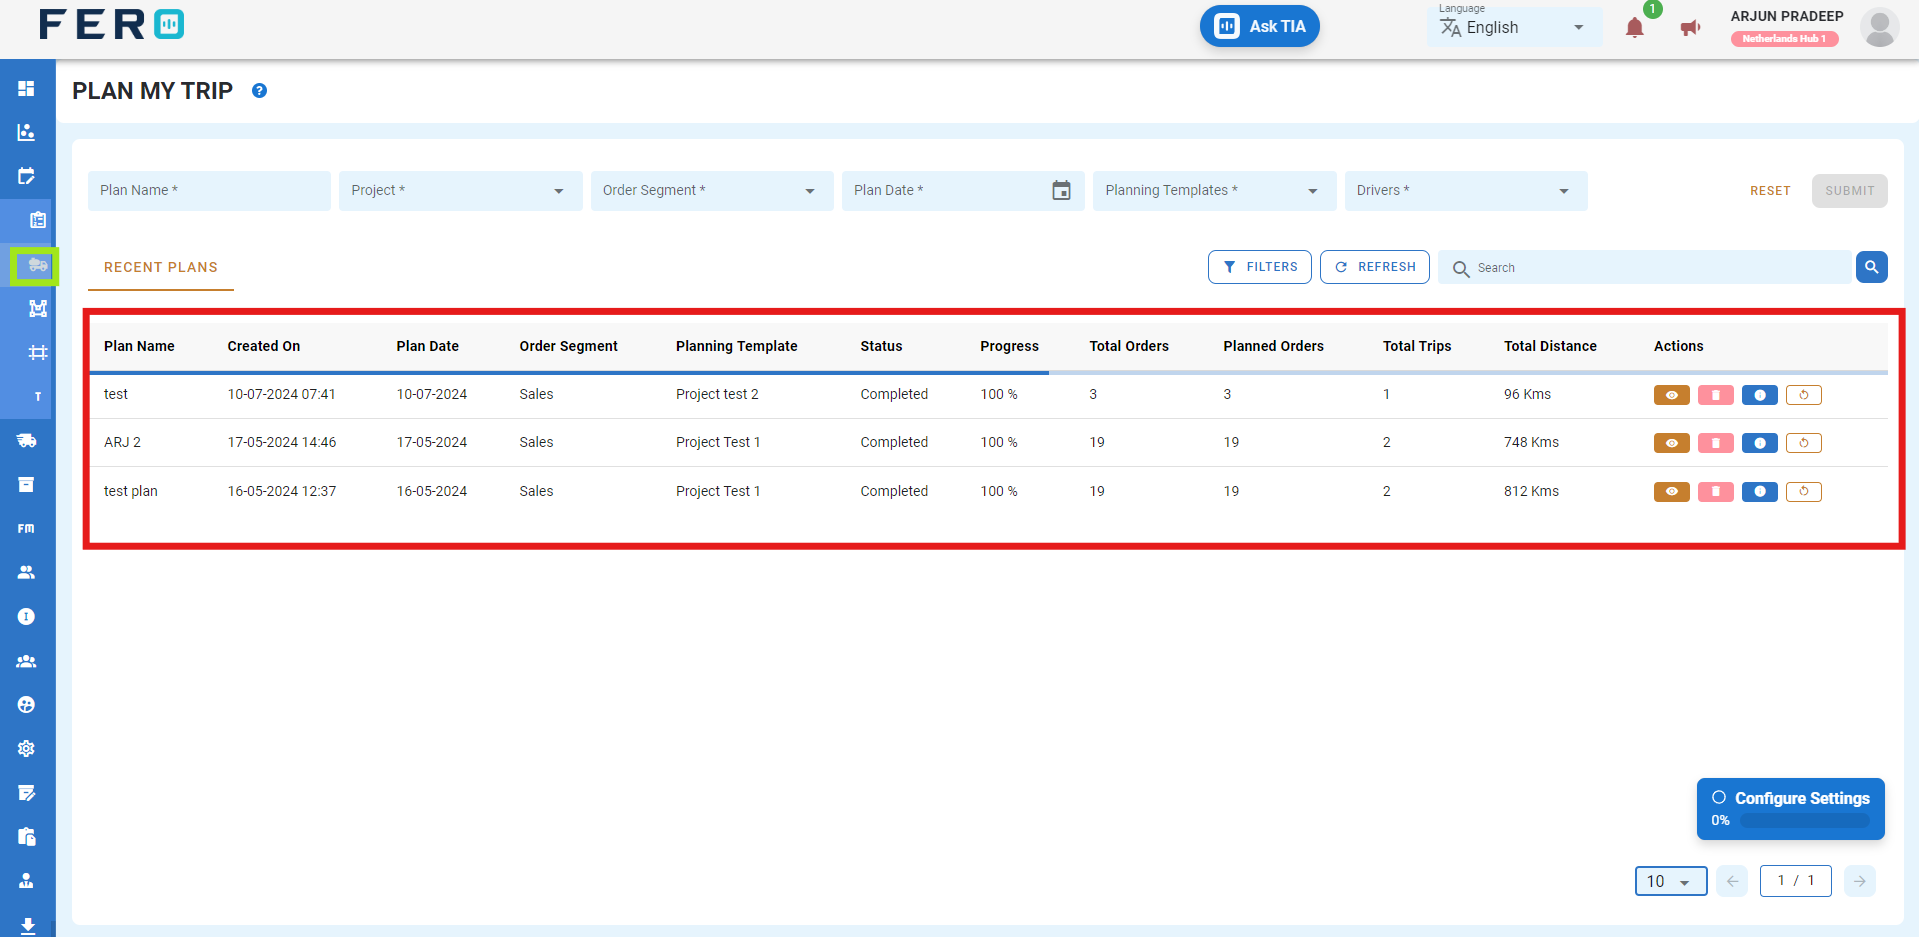
Step 4: To review system generated trips click on eye icon
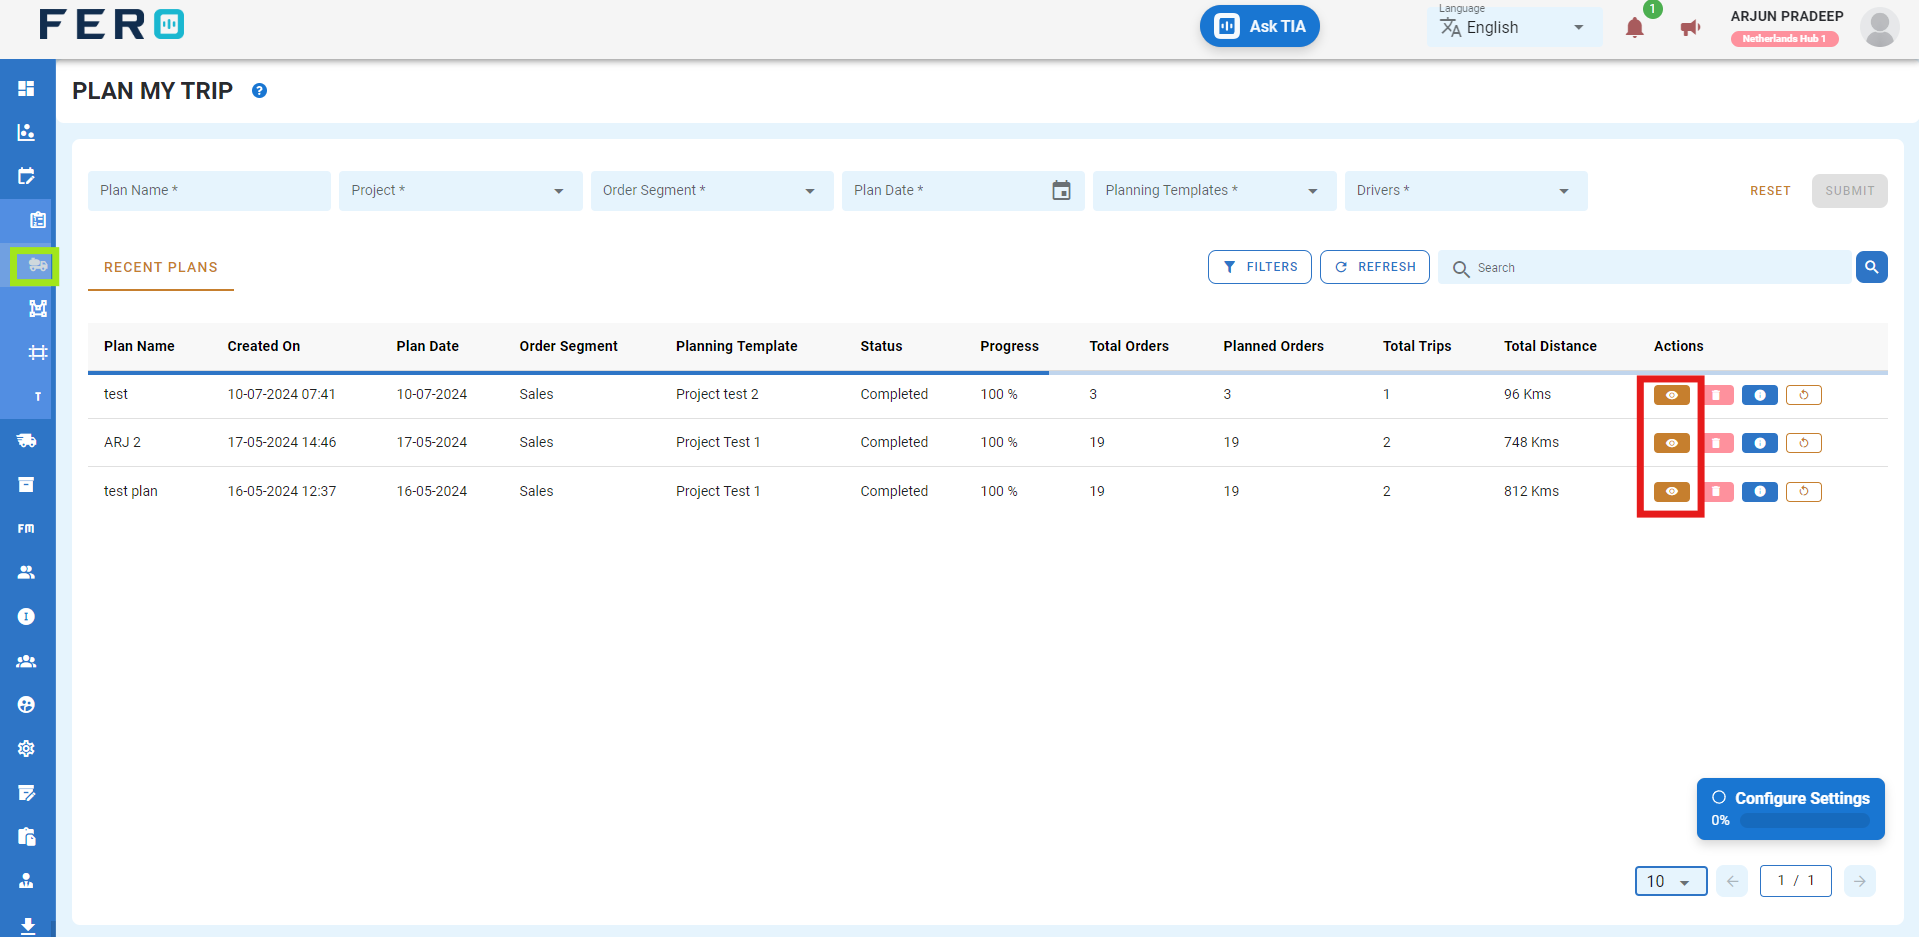
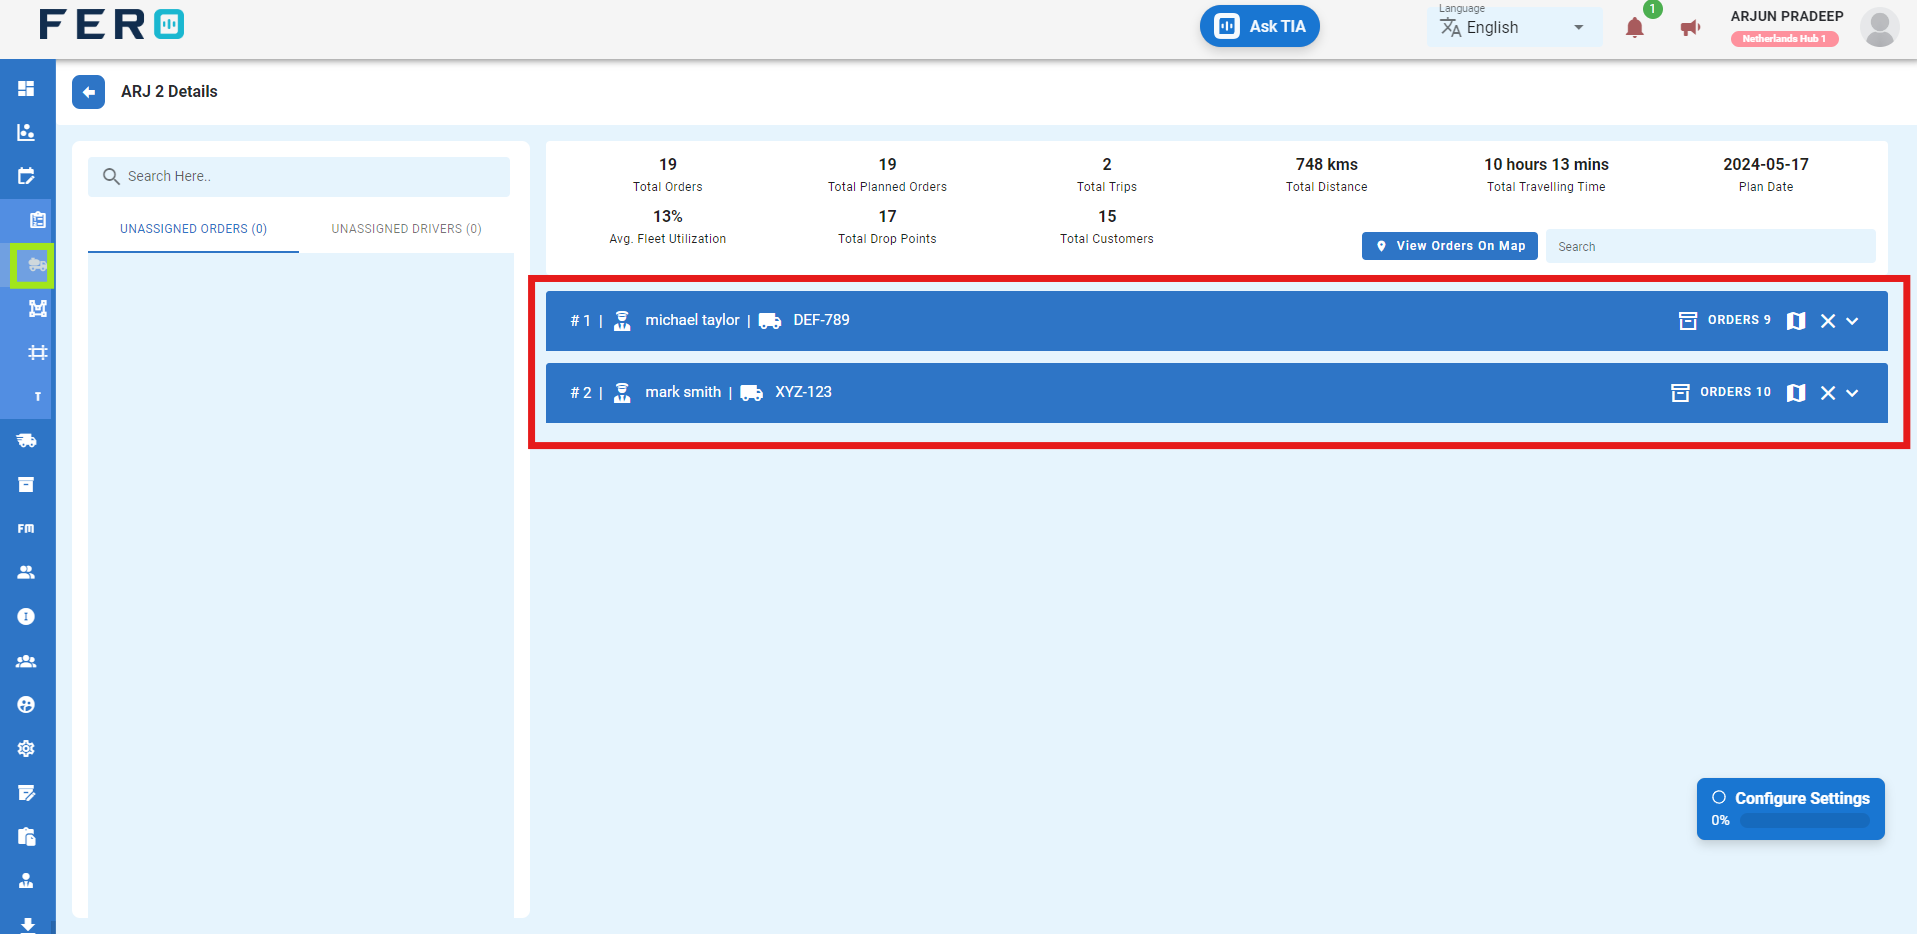
Step 5:-Review the system generated trip on the detail page by clicking on it.
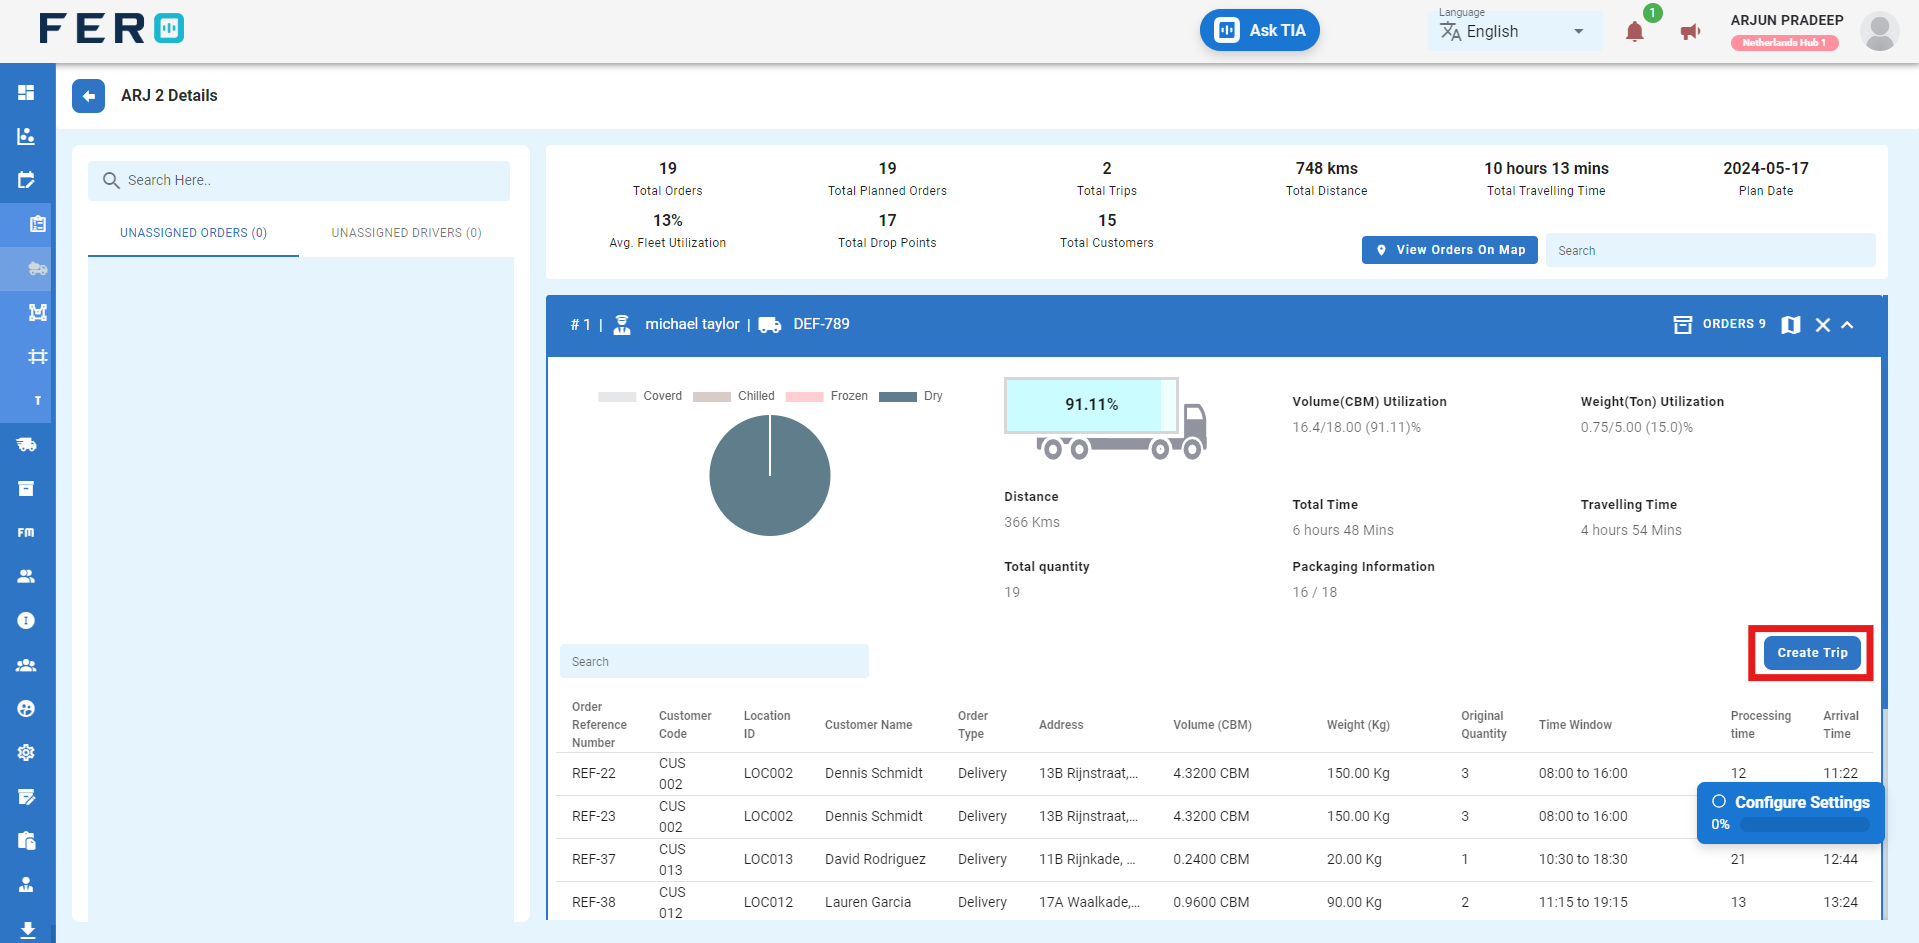
Step 6:- Navigate the create trip button after review the system generated trip
Driver Zone overview
Create zones and assign them to drivers to optimize your delivery workflow. Efficiently manage operational areas, ensuring streamlined and optimized driver assignments.
How to Set Up and Add Driver Zone.
Step 1 :- Access the Trip Planning module from the menu bar and select it to reveal a drop-down list of submodules.

Step 2 :- Go to the Driver zone section and click to open the Driver Zone homepage.
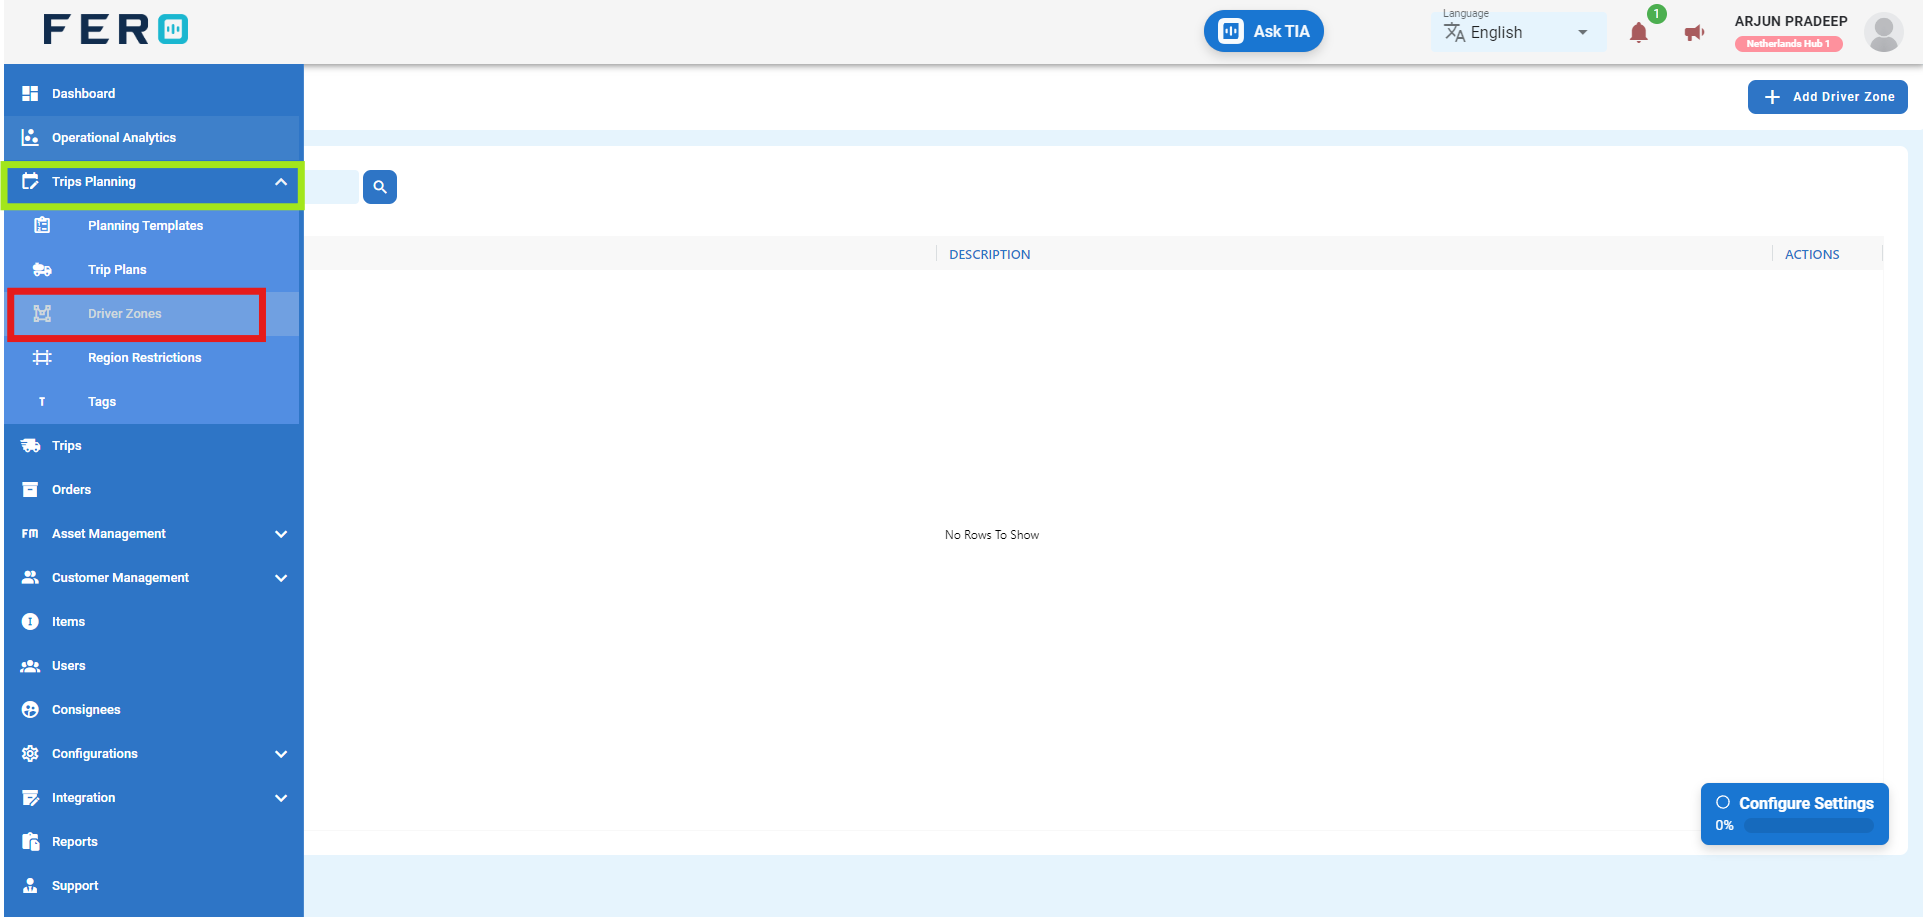
Step 3 :- Click on "Add Driver Zone" to start adding Driver zone to the platform.
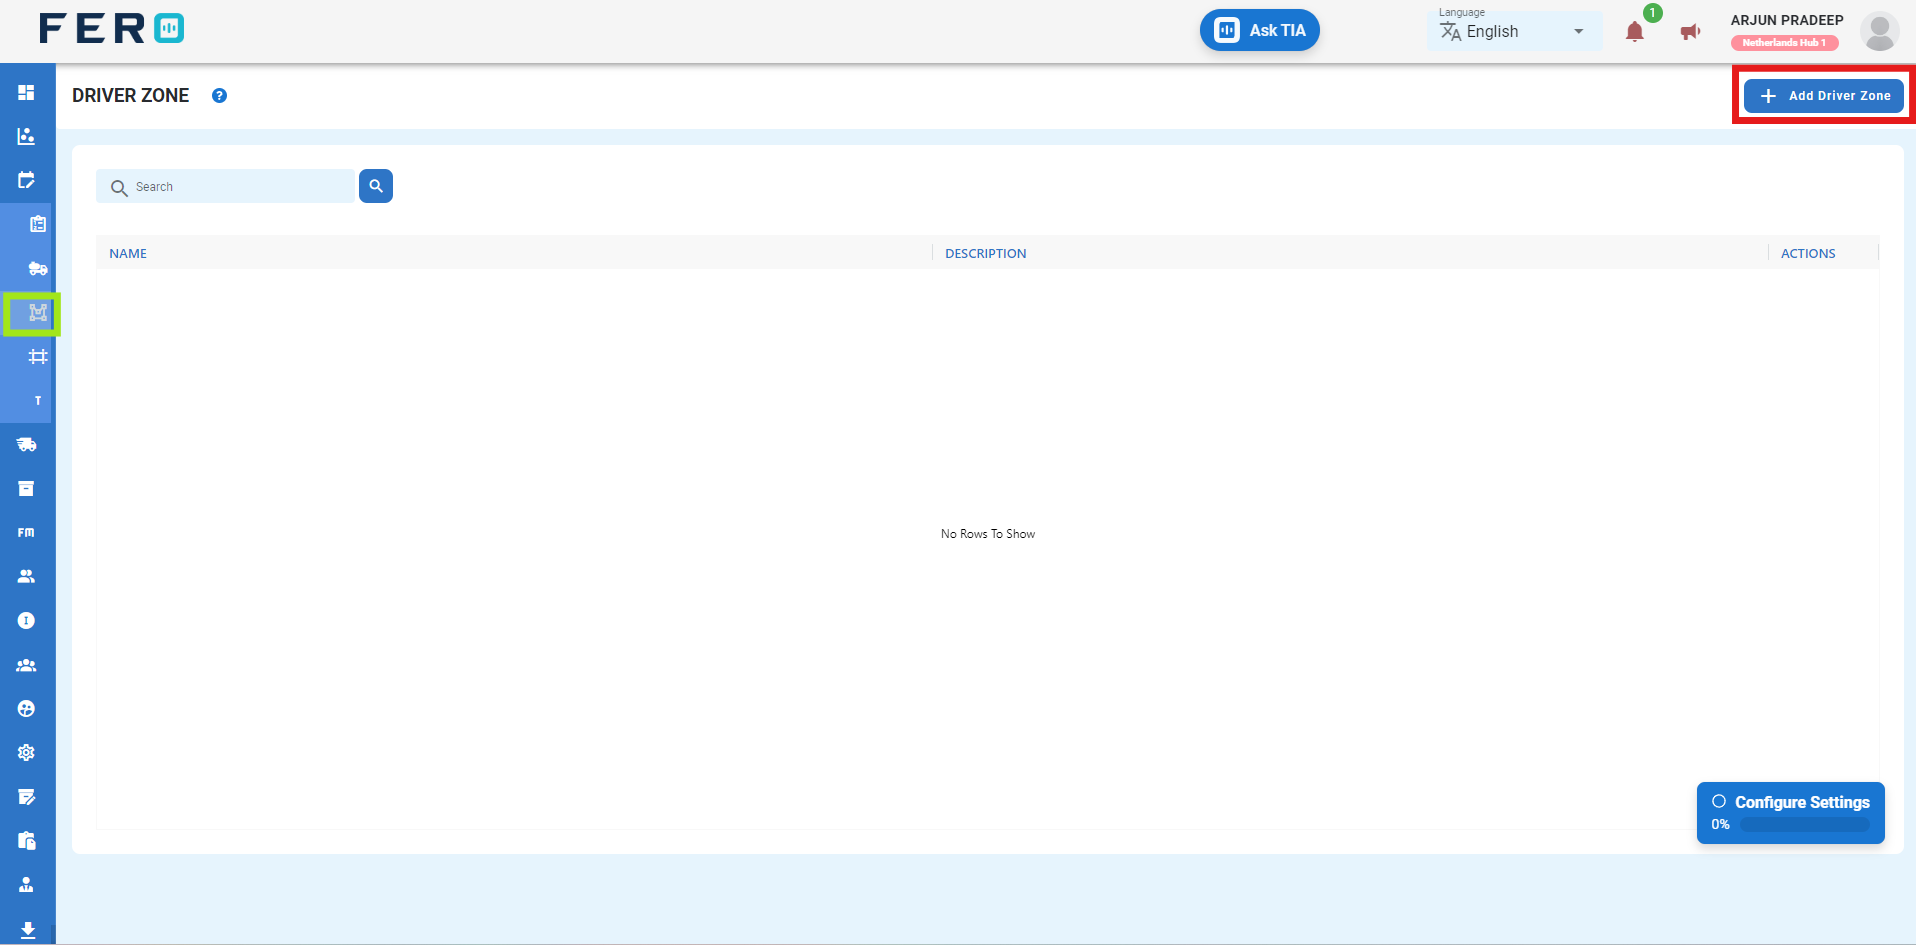
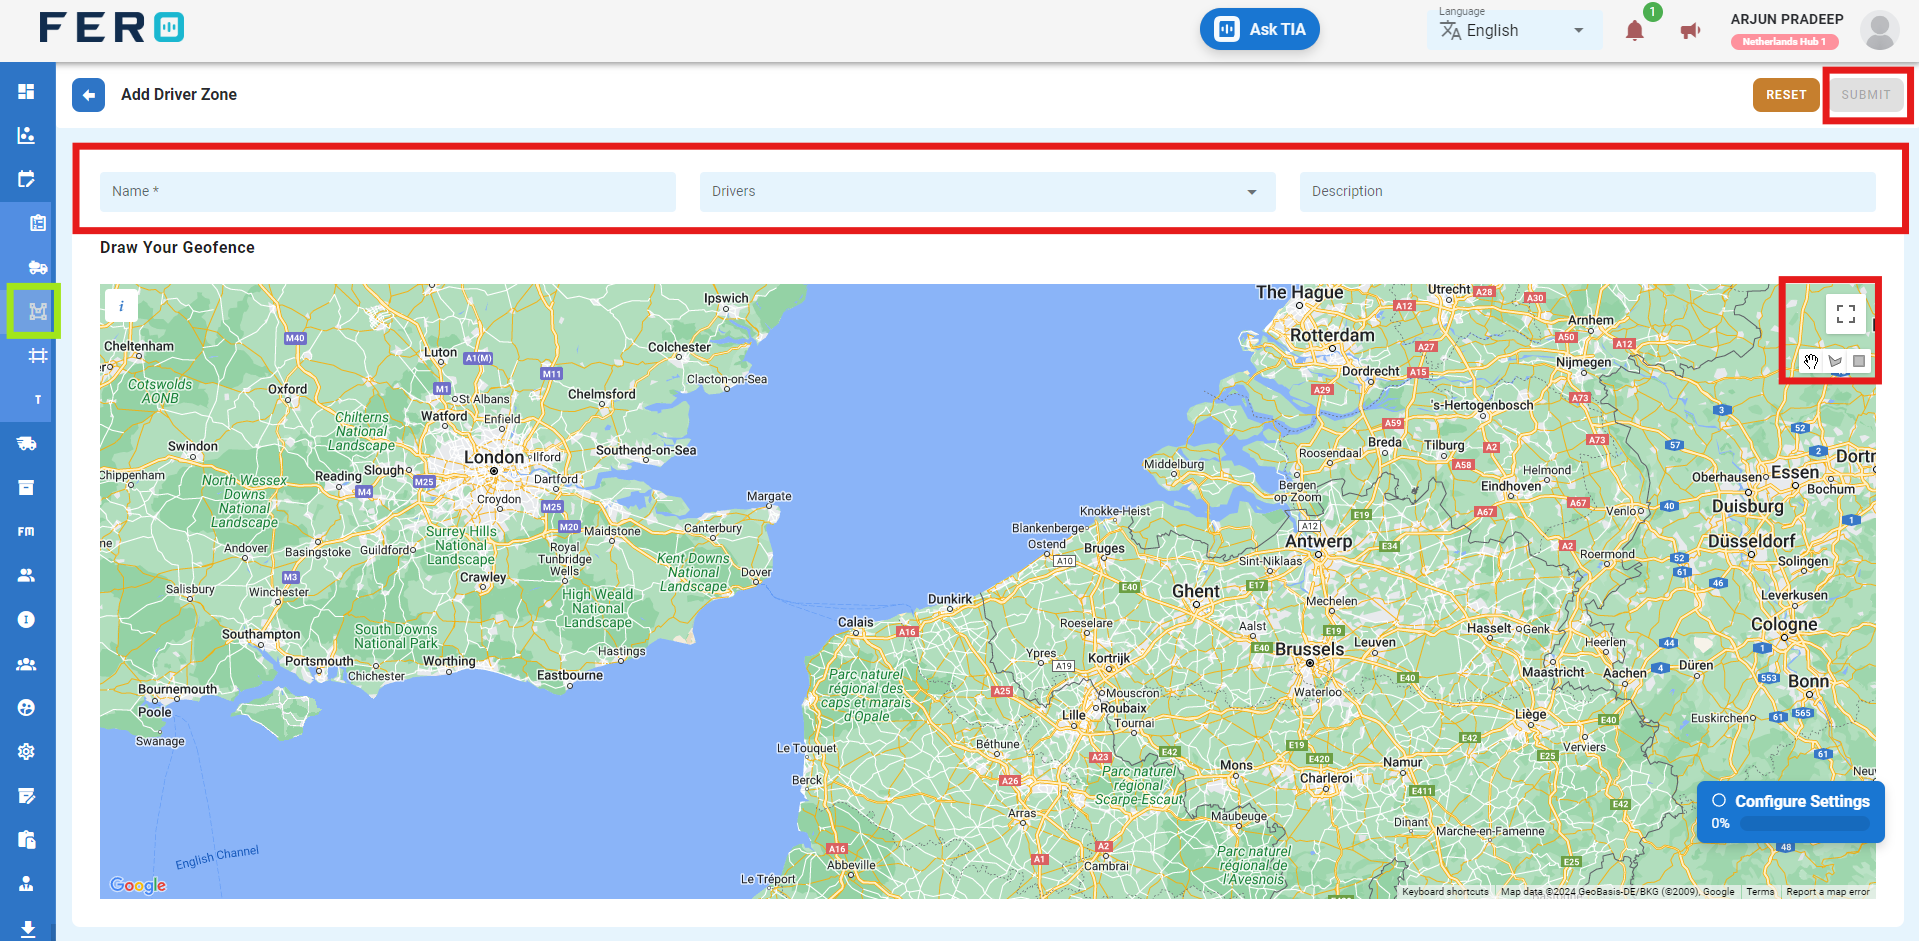
Step 4: Fill Out the 'Driver Zone' Screen
- Zone Name: Enter the name of the zone.
- Select Driver: Choose the driver from the dropdown list.
- Description: Provide a description related to the zone and the driver.
- Map Tools: Use the map tools to create the zone on the map.
After filling out these fields, click the "Submit" button. system will create a trip plain in the system, allowing you to manage it effectively within your transportation operations.
FAQs
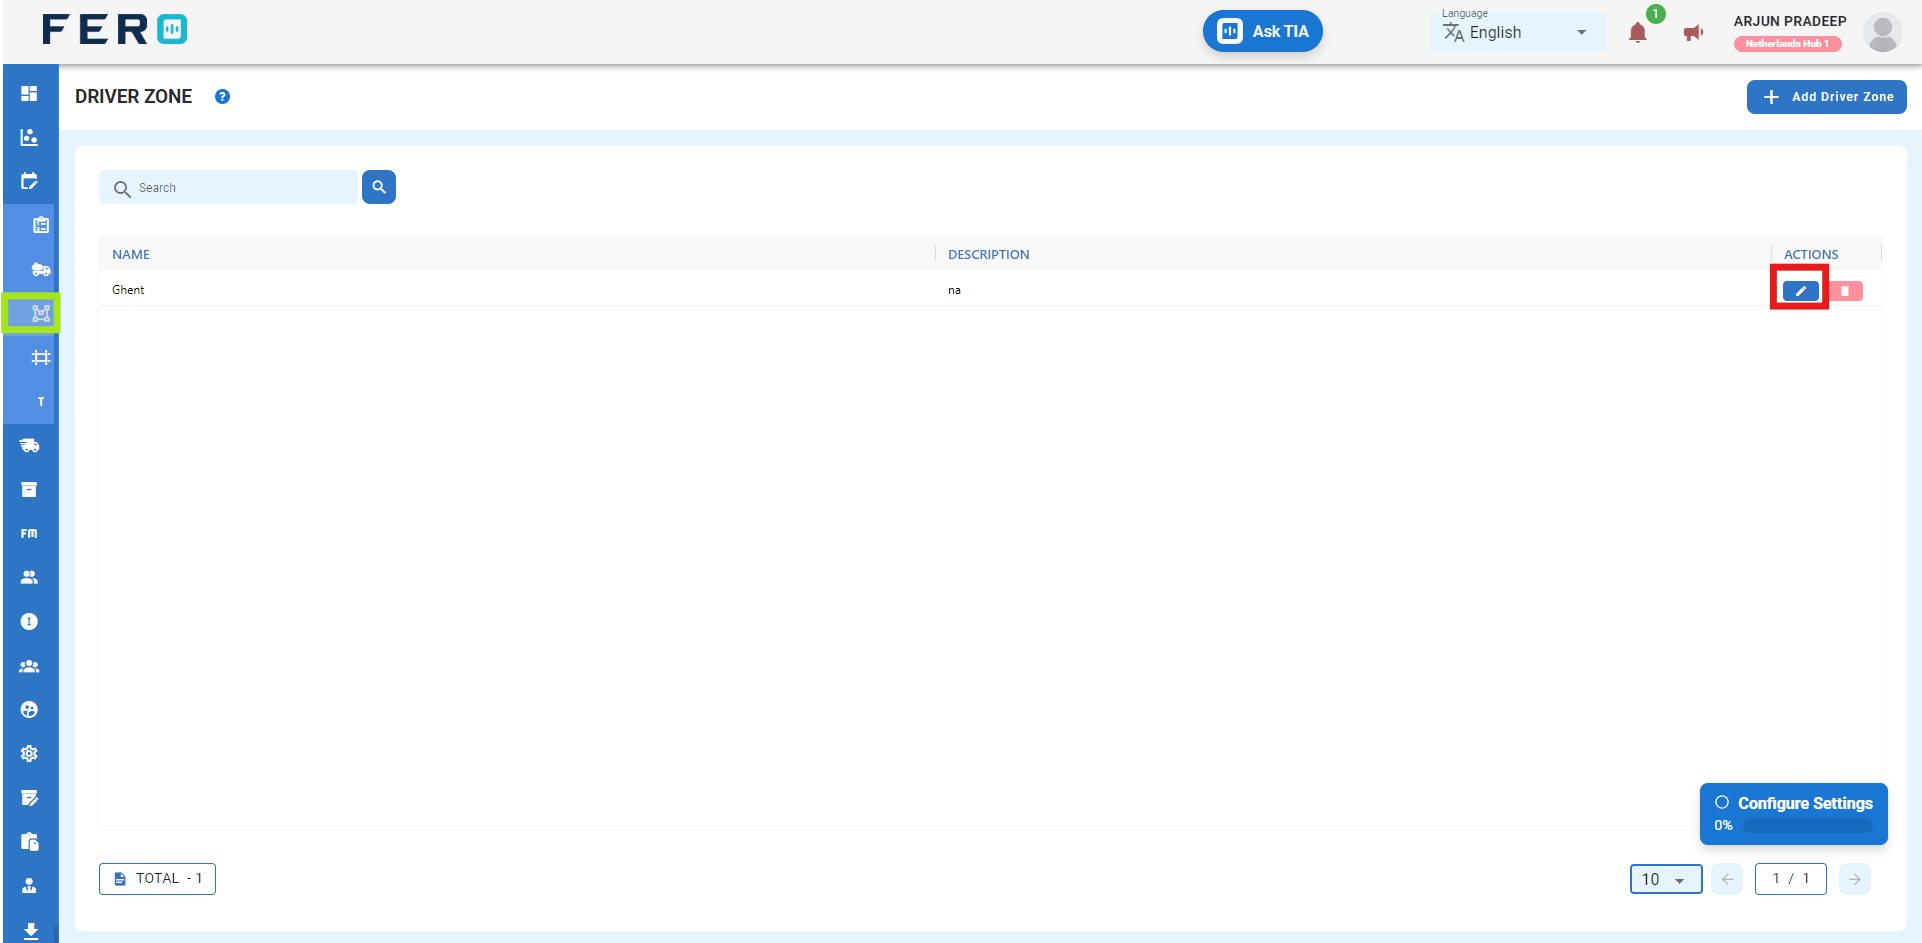
Q1.How to Edit the Driver Zone?
Yes, you can edit the Driver Zone. Navigate to the edit icon in the Driver Zone home screen.
Region Restriction overview
These restrictions will help control trip planning, ensuring that orders are not planned in restricted regions for a more tailored and efficient delivery operation.
How to Set Up and Add Region Restriction.
Step 1 :- Access the Trip Planning module from the menu bar and select it to reveal a drop-down list of submodules.

Step 2 :- Go to the Region Restriction section and click to open the region Restriction homepage.
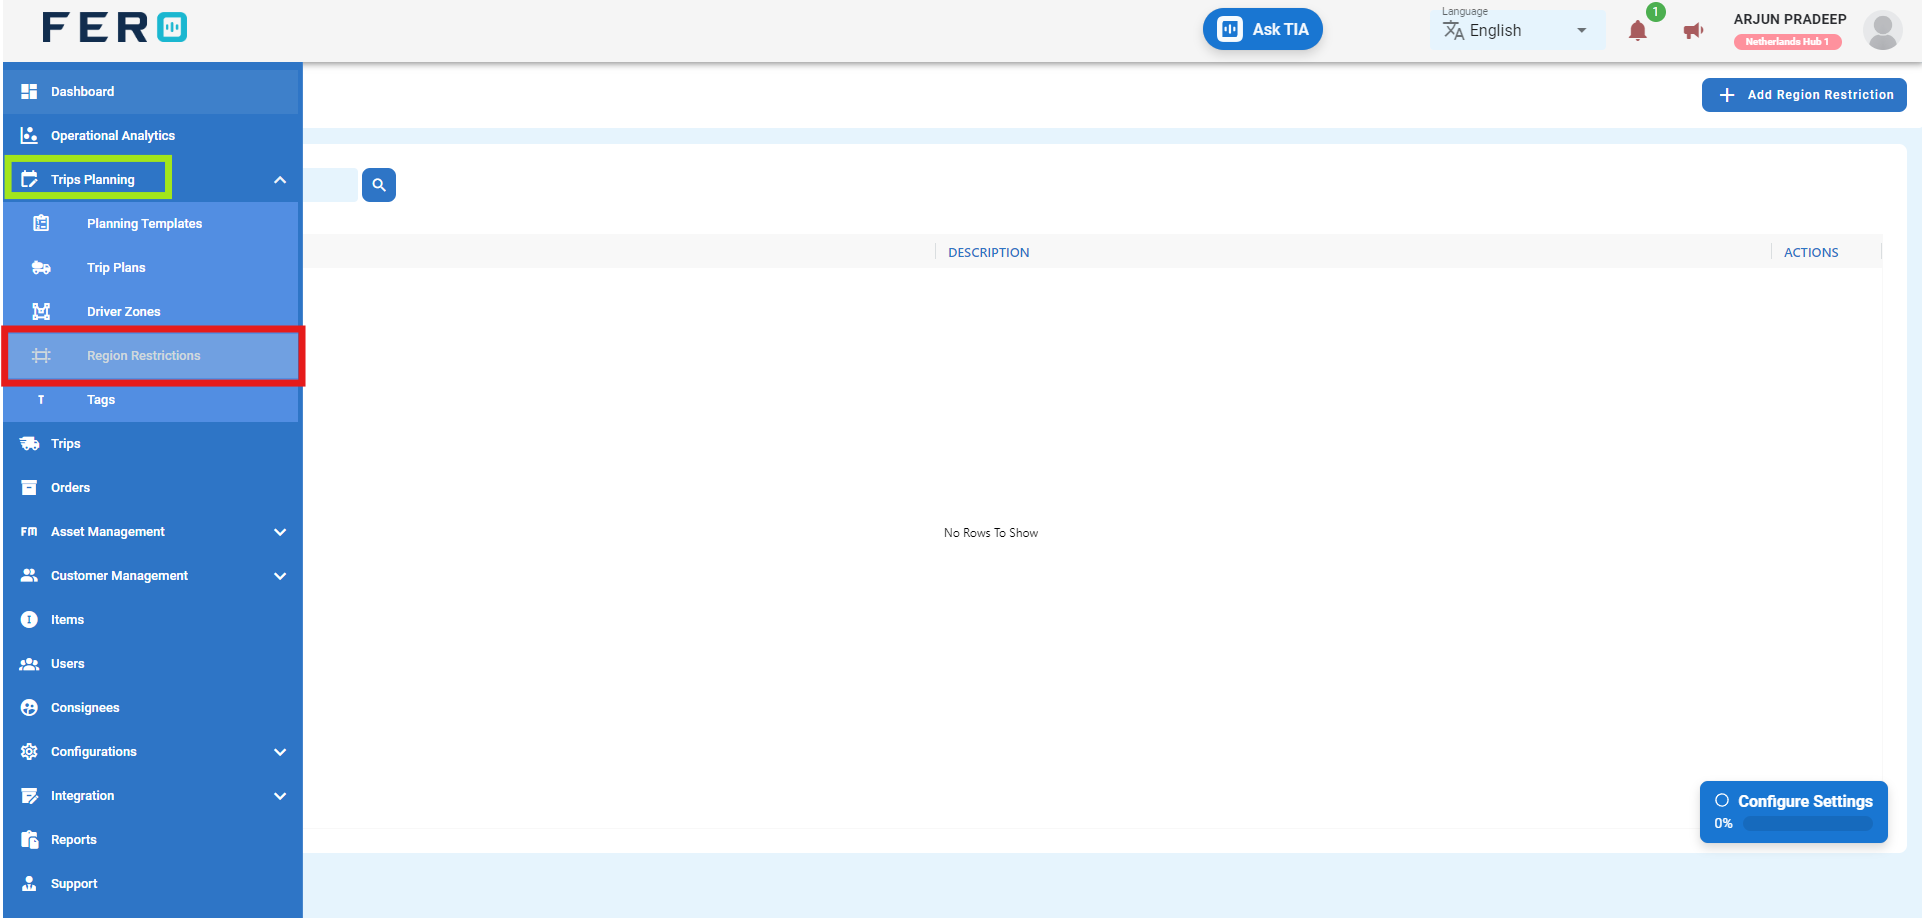
Step 3 :- Click on "Add Region Restriction" to start adding Region Restriction to the platform.
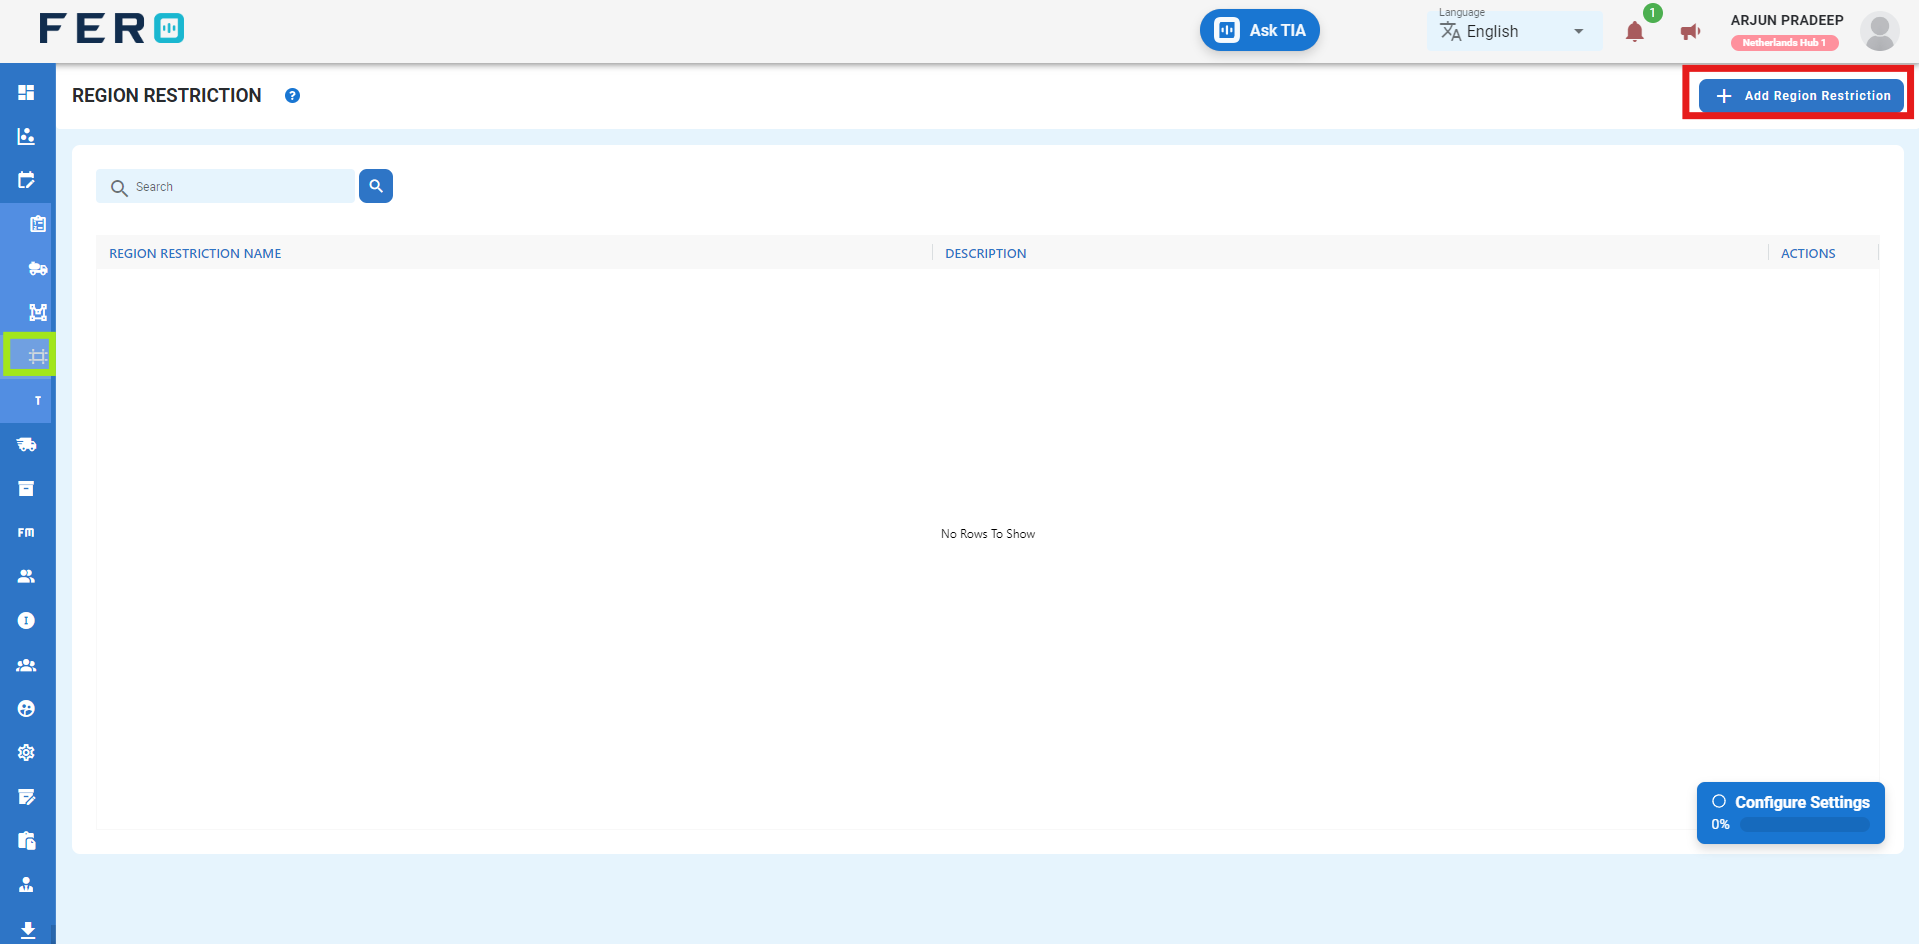
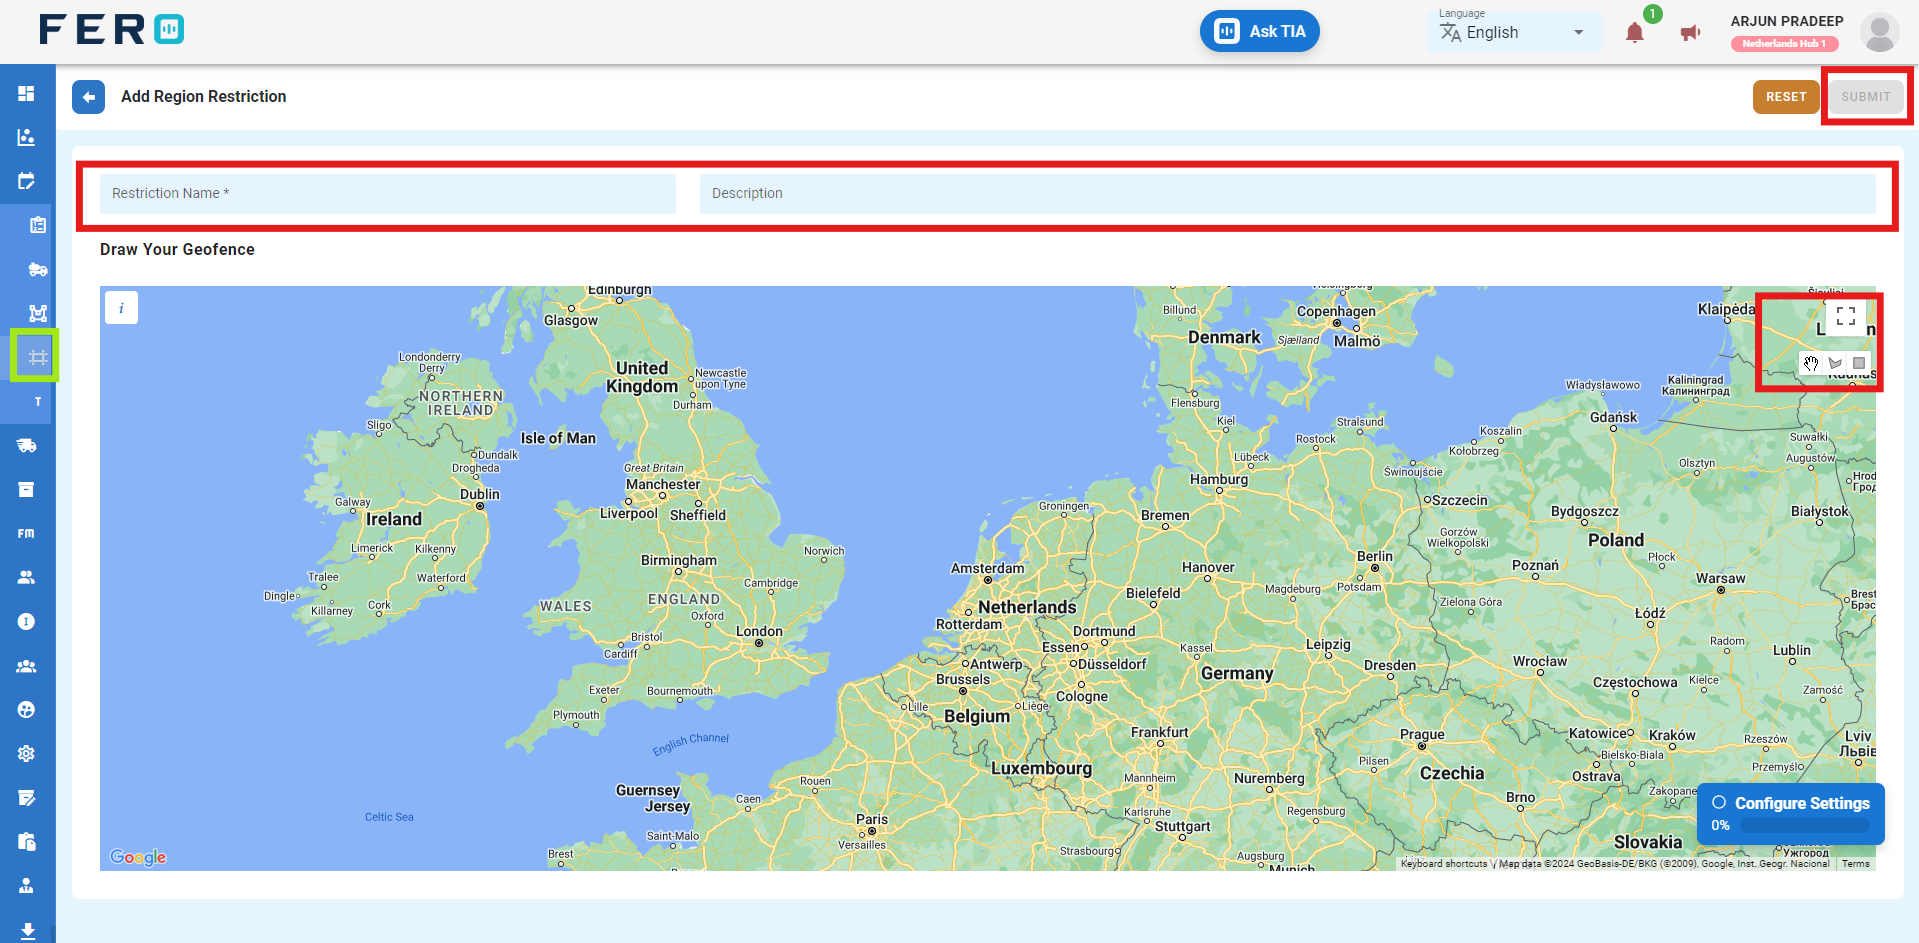
Step 4: Fill Out the 'Region Restriction' Screen
- Restriction Name: Enter the name of the Restriction.
- Enter the description regarding to zone and driver.
- Use map tools to create a zone in the map
After filling out these fields, click the "Submit" button. system will create a trip plain in the system, allowing you to manage it effectively within your transportation operations.
FAQs
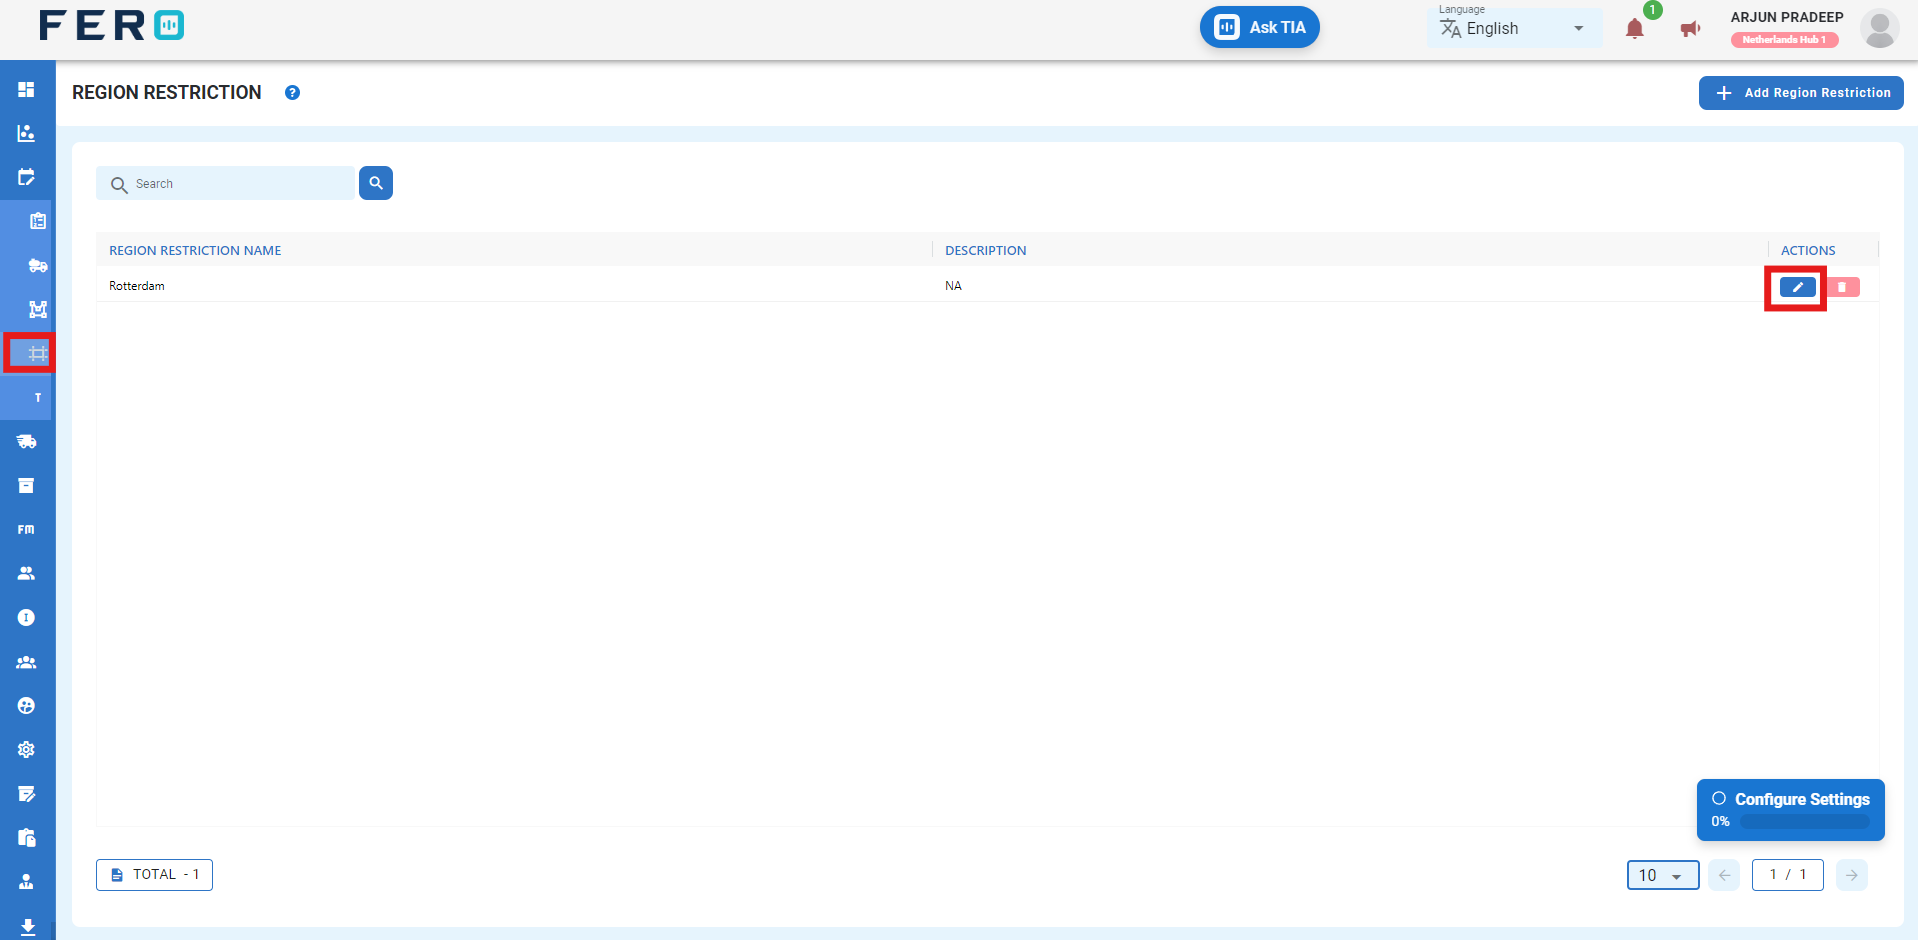
Q1.How to Edit the Region Restriction?
Yes, you can edit the Region Restriction. Navigate to the edit icon in Region Restriction home screen.
Tags overview
Use tags for efficient trip planning, linking trips to customer groups, locations, and vehicles. Apply tags to streamline planning, consolidating orders for specific groups in designated regions for tailored delivery.
How to Set Up and Add Tags.
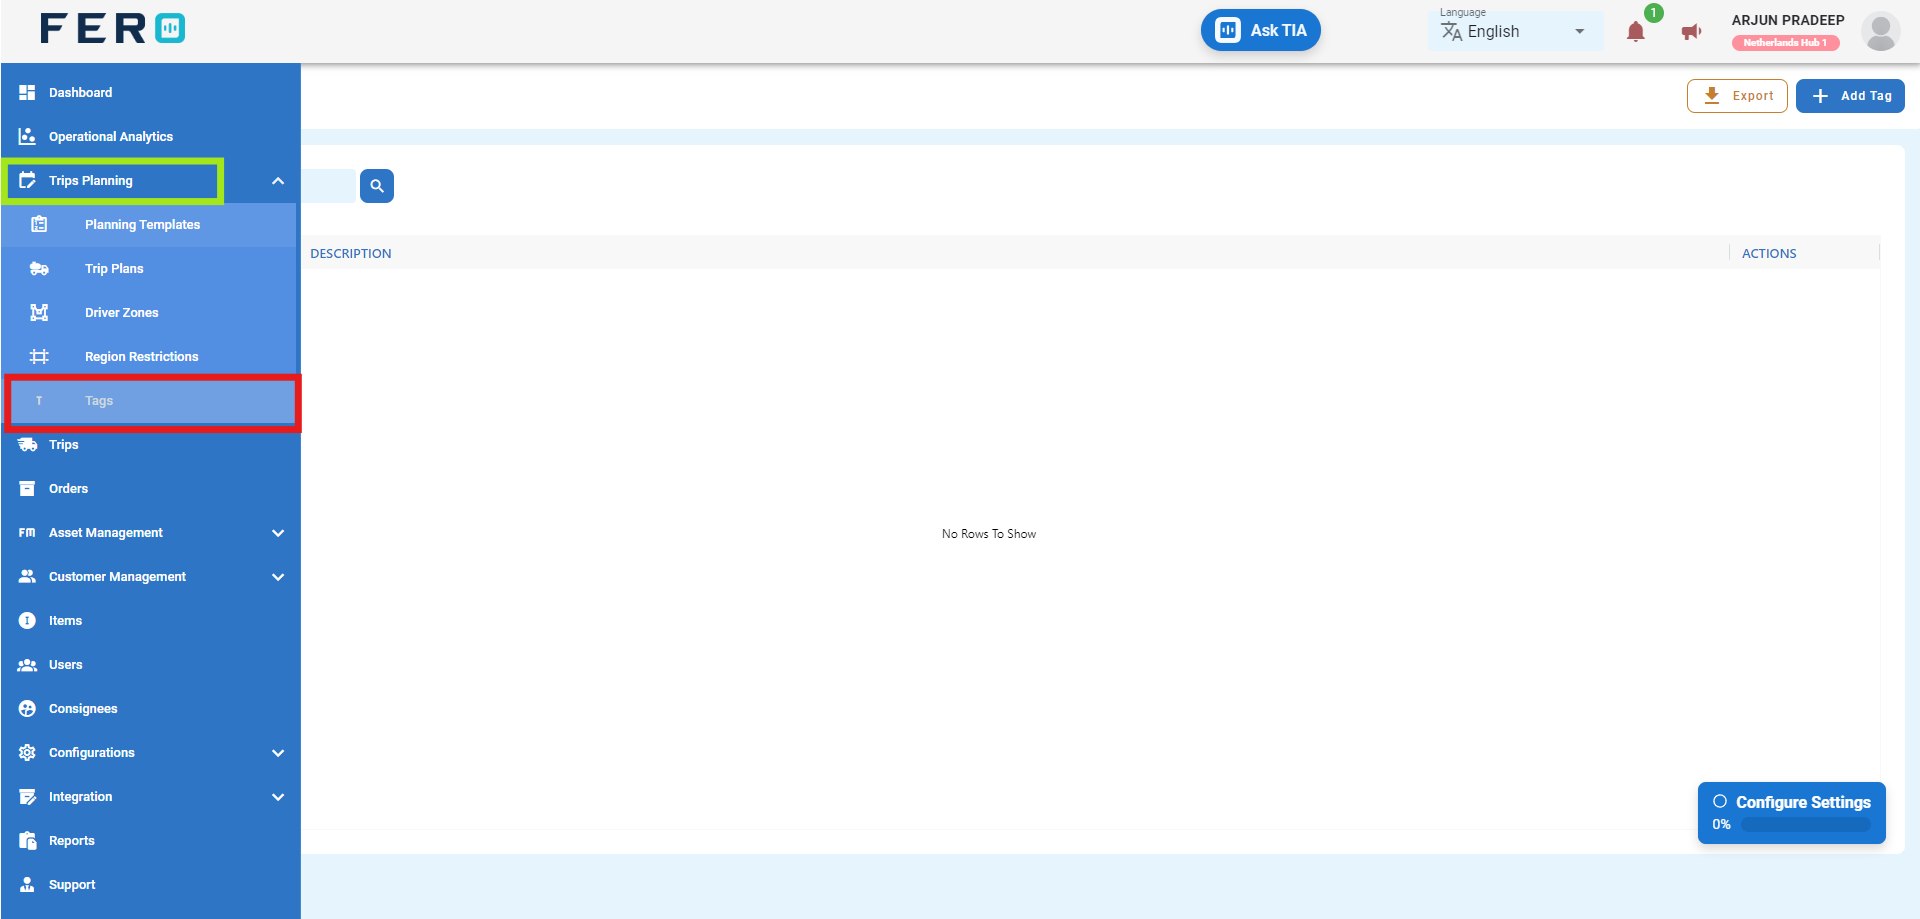
Step 1 :- Access the Tags module from the menu bar and select it to reveal a drop-down list of submodules.

Step 2 :- Go to the Tags section and click to open the Tags homepage.
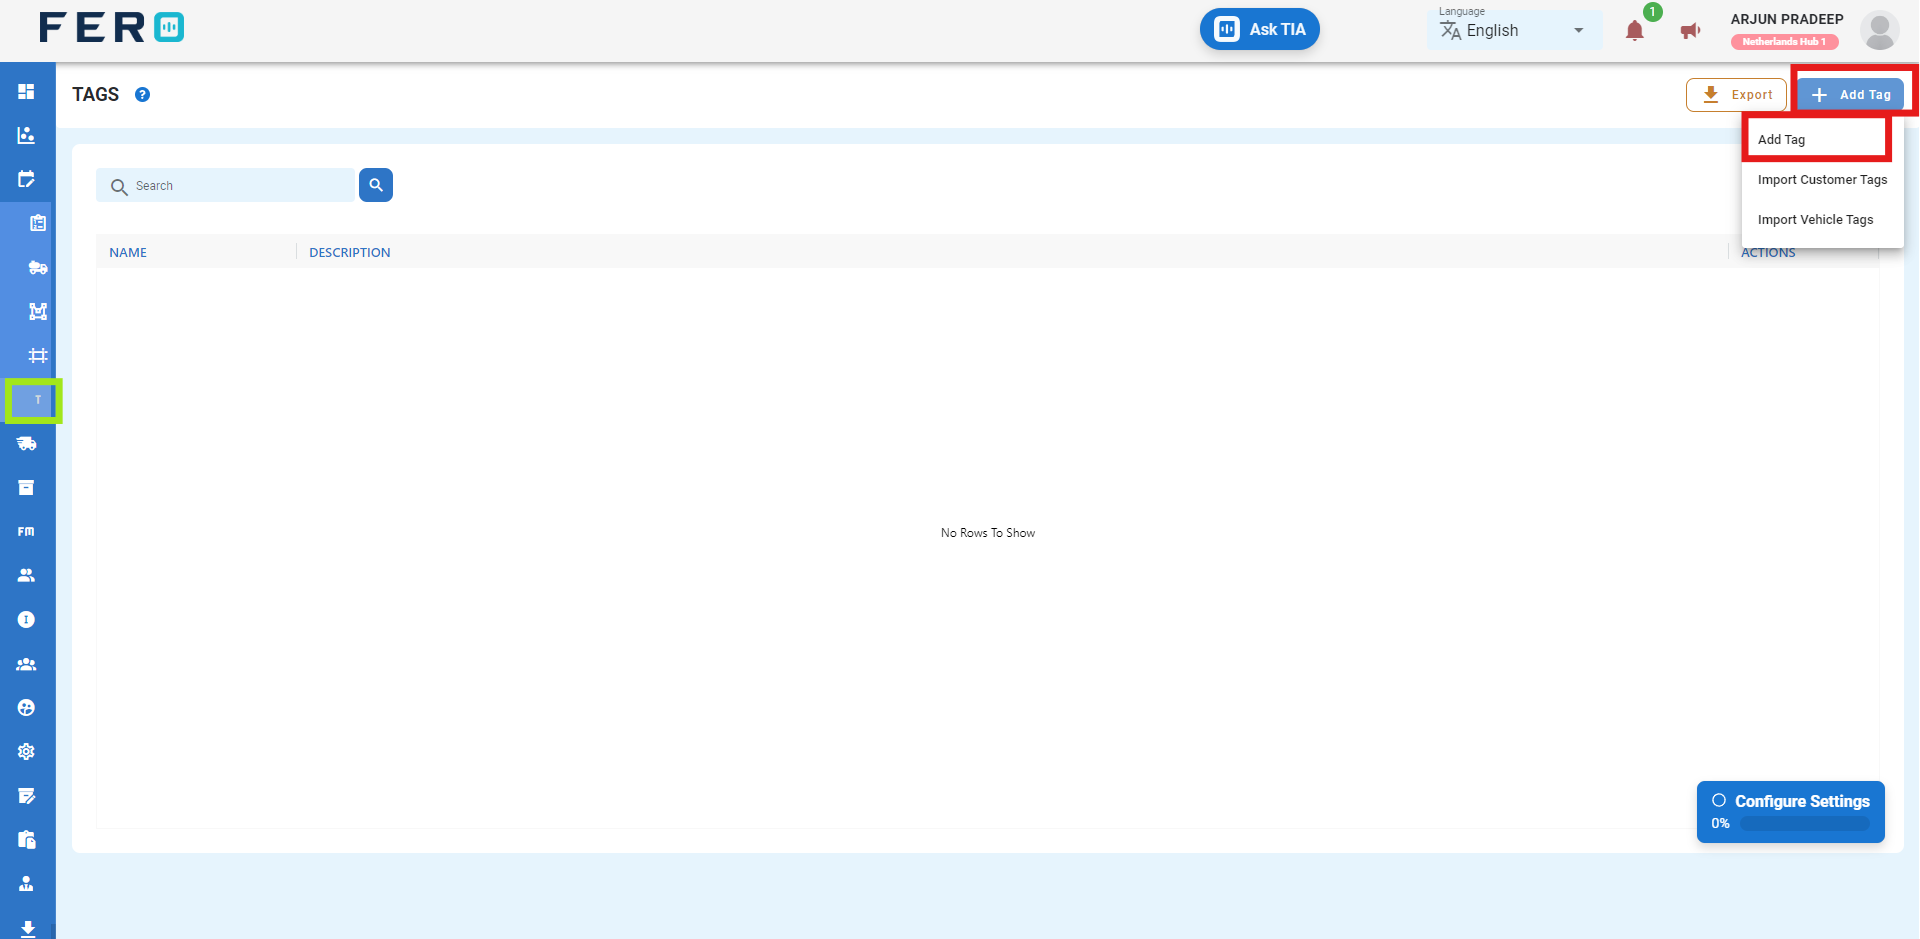
Step 3 :- Click on "Add Tags" to start adding Tags to the platform.
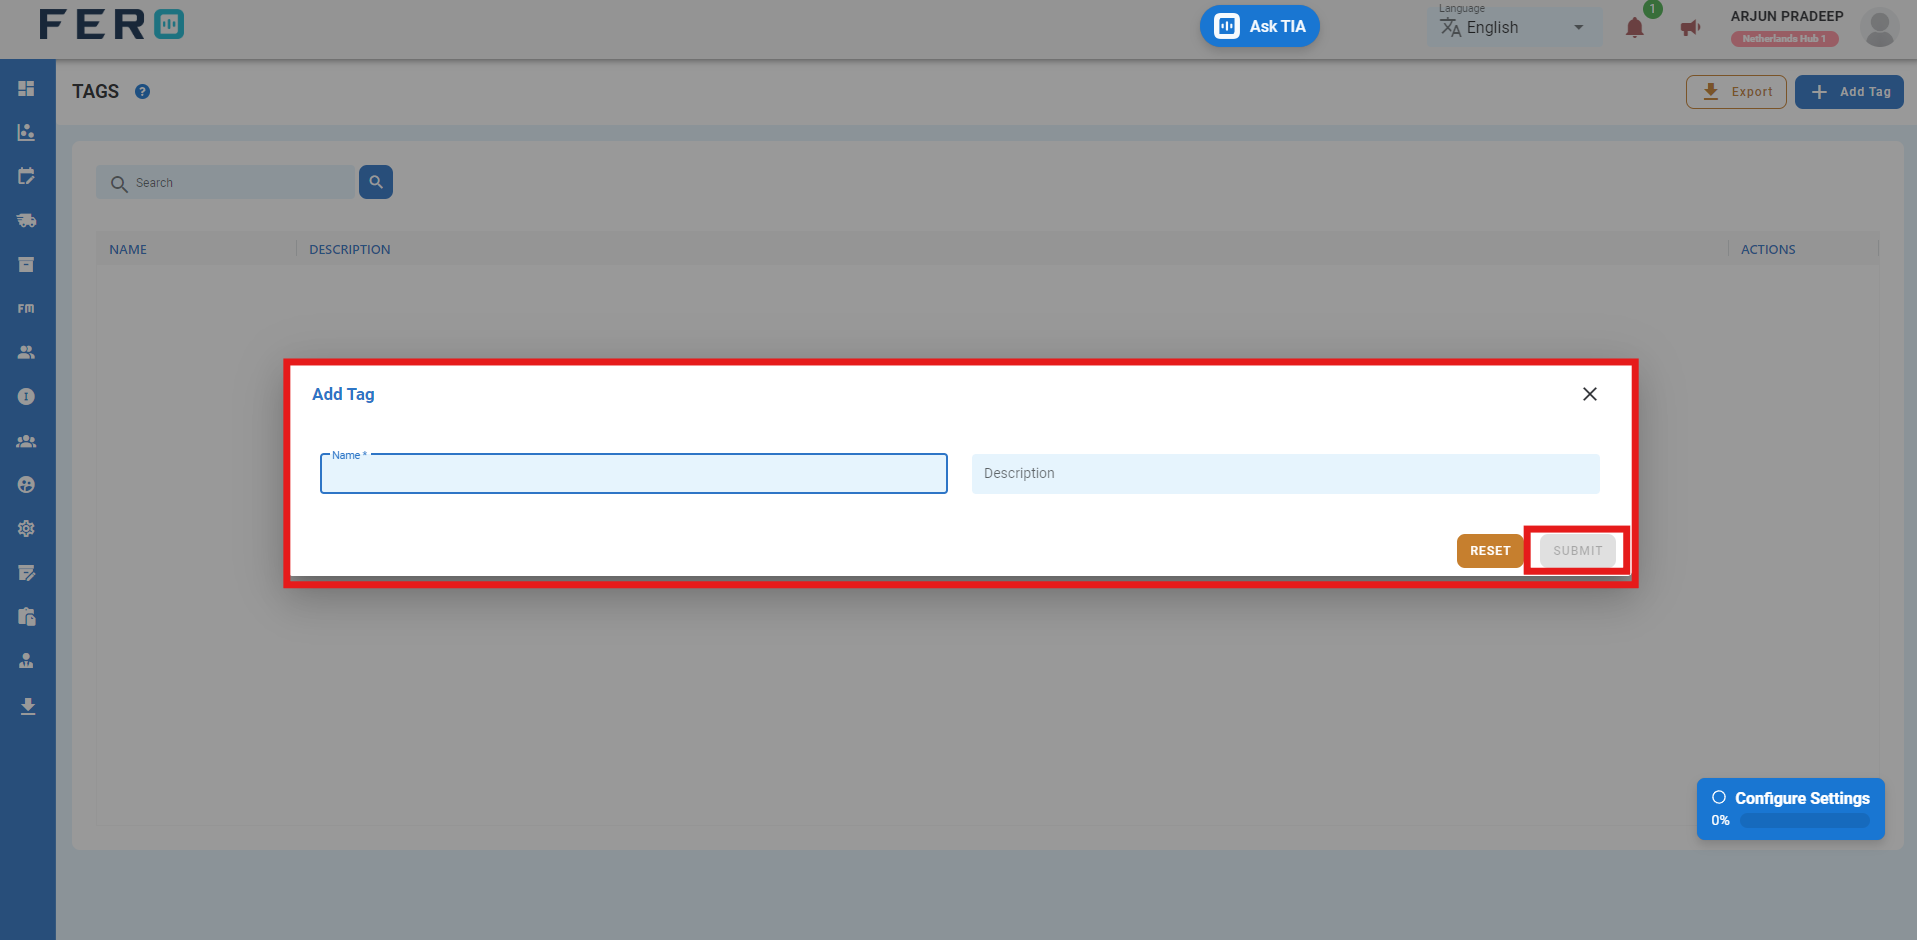
Step 4: Fill Out the 'Tags' Screen Tag Name and the description then click submit
How to Add Tags on vehicles.
Step 1 : Select the Asset Management module Begin by navigating to the Asset Management module.
Step 2: Click on the Vehicle option Within the module, locate and select the "Vehicle" option.
Step 3: Click on the Tag buttons In the top right corner,
Step 4: Click on the drop-down menu A drop-down menu will appear. Click on it to see the available options.
Step 5: Click on the Add button After making the necessary selections, click on the "Add" button to complete the process.
add video link
How to Add Tags on customer address.
Step 1 : Select the Customer Management module Start by navigating to the Customer Management module.
Step 2 : Click on the Customer Addresses option Inside the module, locate and select the "Customer Addresses" option.
Step 3 : Click on the Add Tags button In the top right corner, click on the "Add Tags" button.
Step 4 : Click on the drop-down menu and select the tag From the drop-down menu that appears, select the desired tag.
Step 5 : Click on the Add button After selecting the tag, click the "Add" button to finalize the process.
add video link
